
In this post, we are going to show that how to Install Anaconda on Ubuntu 18.04 | 20.04. If your are going to Install Anaconda on your Ubuntu system then this post is ideal for you.
Anaconda is the most popular and open-source platform for Python, R data science and machine learning on Linux, Windows and Mac OS. It is comes with more than 1500 popular Python/R data-science packages. It is most useful platform for developing, testing Python/R applications.
Ubuntu is a Linux Operating System based on Debian and mostly composed of non-profit(free) and open-source software. It is a complete Linux operating system that compatible with desktops, laptops, server and other devices. Ubuntu is Open Source so it is freely available for both community and professional support.
if you are a learner and looking for a Linux distribution for Learning then Ubuntu Linux Operating System is best for you as a beginning.
How to Install Anaconda on Ubuntu
Simply follow below steps to install Anaconda on your Ubuntu system:
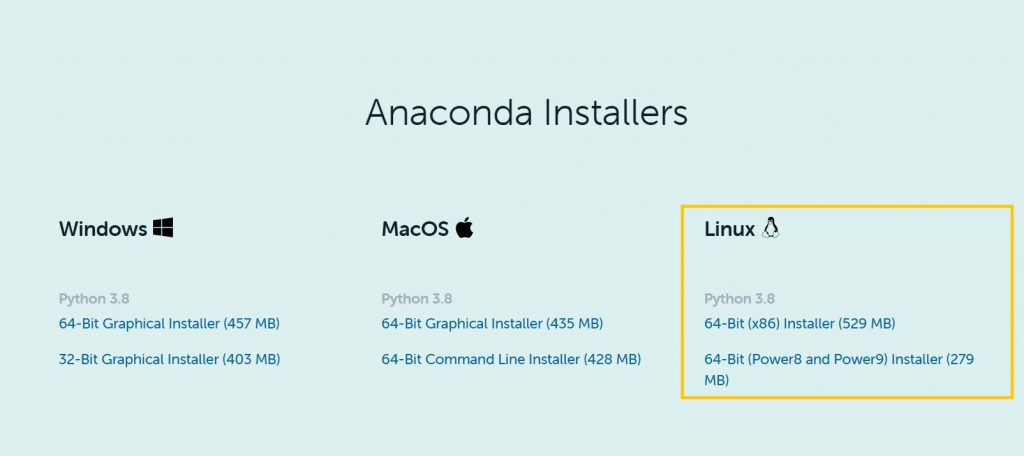
Step 1 : Download Anaconda Install Script
Anaconda comes with its own installation script, you just need to download it and install it,
To download Anaconda Installation Script, visit its Download Page by click here.
you can also download Anaconda Installation Script using command line. First Navigate to /tmp directory by running command below:
cd /tmp
Now download its installation script using wget or curl command as show below:
wget –P ~/Downloads https://repo.anaconda.com/archive/Anaconda3.2020.02-Linux-x86_64.sh
Step 2 : Run Anaconda Installation Script
After download the script, run the command below to start installation process of Anaconda:
bash Anaconda3-2020.02-Linux-x86_64.sh
The above command display a output similar like below:
Welcome to Anaconda3 2020.02

In order to continue the installation process, please review the license
agreement.
Please, press ENTER to continue
>>>
Press ENTER key from your system keyboard to continue. Press ENTER key again to scroll the license agreement.
After read its license, you will be prompted to approve the license terms. You should type yes to accept it license.
Do you approve the license terms? [yes|no]
[no] >>> yes
After that, the installation process ask you to choose a default installation location(directory) to install Anaconda, as show below:
Anaconda3 will now be installed into this location:
/home/studiesonline/anaconda3
    - Press ENTER to confirm the location
    - Press CTRL-C to abort the installation
    - Or specify a different location below
Press ENTER key, if you don’t want to change default installation location.
Next type yes to continue, as show below:
Preparing transaction: done
Executing transaction: done
installation finished.
Do you wish the installer to initialize Anaconda3
by running conda init? [yes|no]
[no] >>> yes
At this point, the installation is finished, you will see a thank message as show similar like below:
==> For changes to take effect, close and re-open your current shell. <==

If you'd prefer that conda's base environment not be activated on startup,
set the auto_activate_base parameter to false:

conda config --set auto_activate_base false

Thank you for installing Anaconda3!
To load Anaconda installation new PATH environment variable into the current shell session, run the command below:
source ~/.bashrc
Step 3 : Verify Anaconda Installation
Run the conda command to verify the installation of Anaconda:
conda
Update Anaconda
Run the command below to update Anaconda
conda update conda
Type yes when ask.
That’s all.
If you face any error and issue in above steps , please use comment box below to report.
If our tutorials helped you, please consider buying us a coffee. We appreciate your support!
Thank you for your support.

