This article shows how to schedule automatic shutdown in Windows 11. If you are a new user and want to schedule automatic shutdown and restart your windows 11 system at specific time then this article is useful and handy for you.
Windows systems allows you to create task and schedule it to automatically shutdown or restart your Windows 11 at a given time. Many tasks in your Windows system takes too much time to complete such as downloading data, transferring data, installing important updates and many others. During these task, we can not wait until these tasks finish to shut down the computer.
In this situation, you can schedule automatic shutdown or restart to save your time. If you want to schedule automatic shutdown for your system, steps below will learn you how to schedule a task in your Windows system.
New Microsoft Windows 11 is a major release of the Windows NT operating system developed by Microsoft Windows. It is the successor to Windows 10 and it’s expected to be released later this year. It comes with many new and interesting features such as new user desktop, centered taskbar, new Start menu, rounded corners windows, new themes and colors and many more.
When you are ready, follow the steps below to schedule automatic shutdown in Windows 11 in your Windows 11 system:
How to Automatically Shutdown or turn off Windows 11 Computer
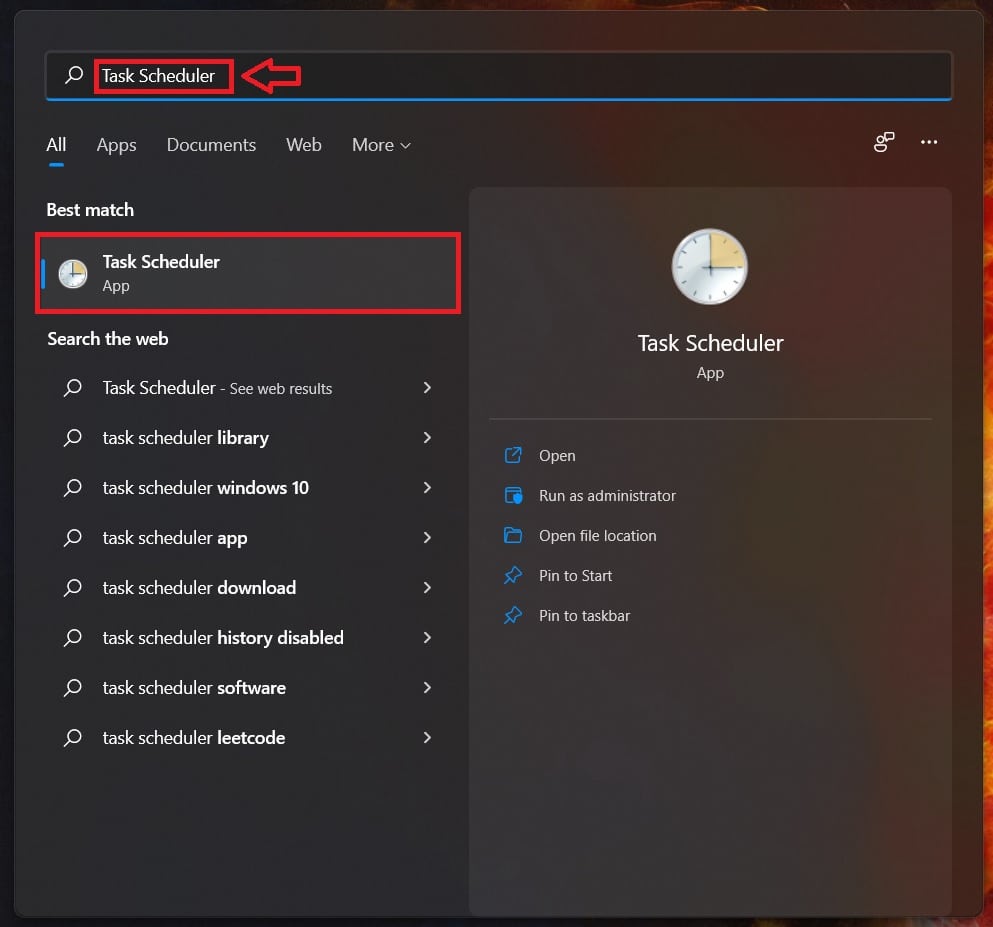
To schedule shutdown, open the Start menu and search for Task Scheduler. After search select Task Scheduler app as shown in the image below:
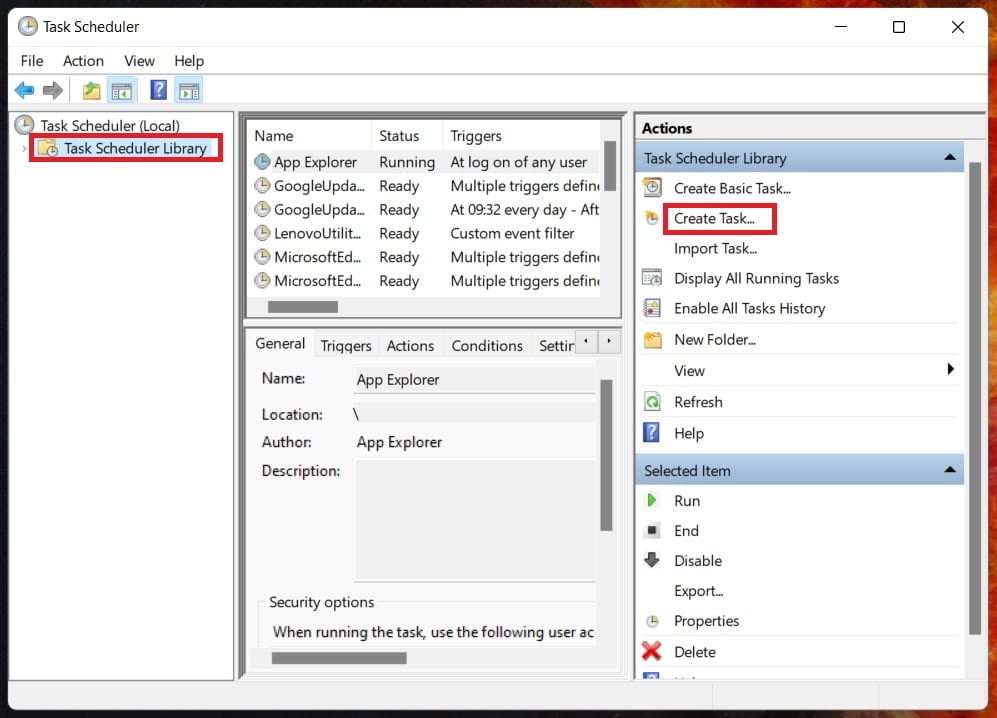
On the Task Scheduler page, first click on the Task Scheduler Library and then click on Create Task as shown in the image below:
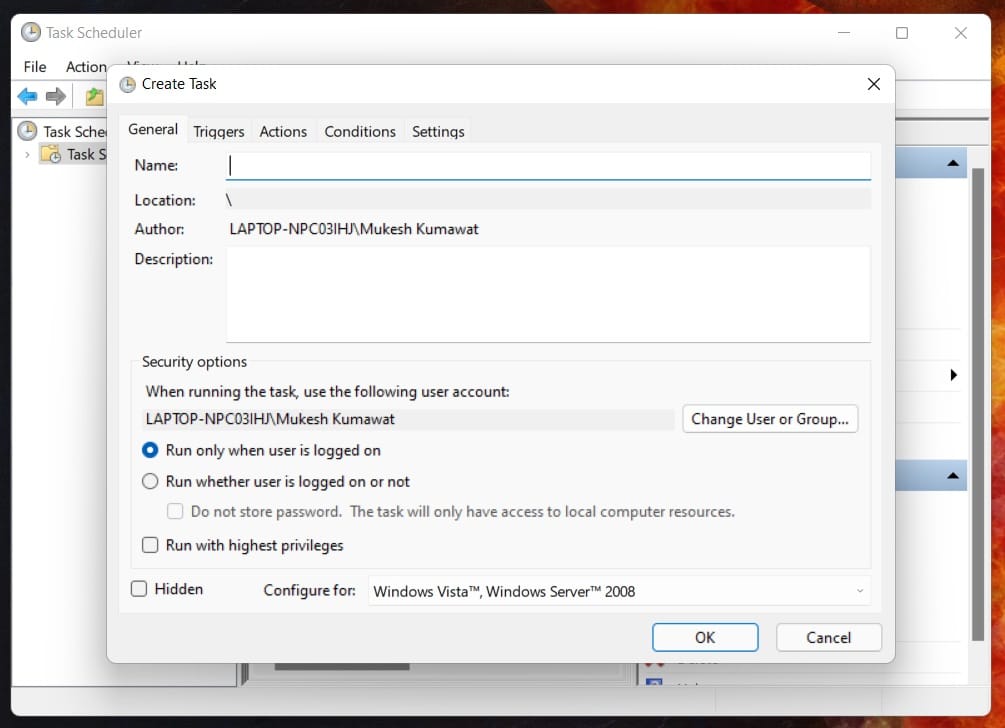
Next, a new pop up will open up similar like below:
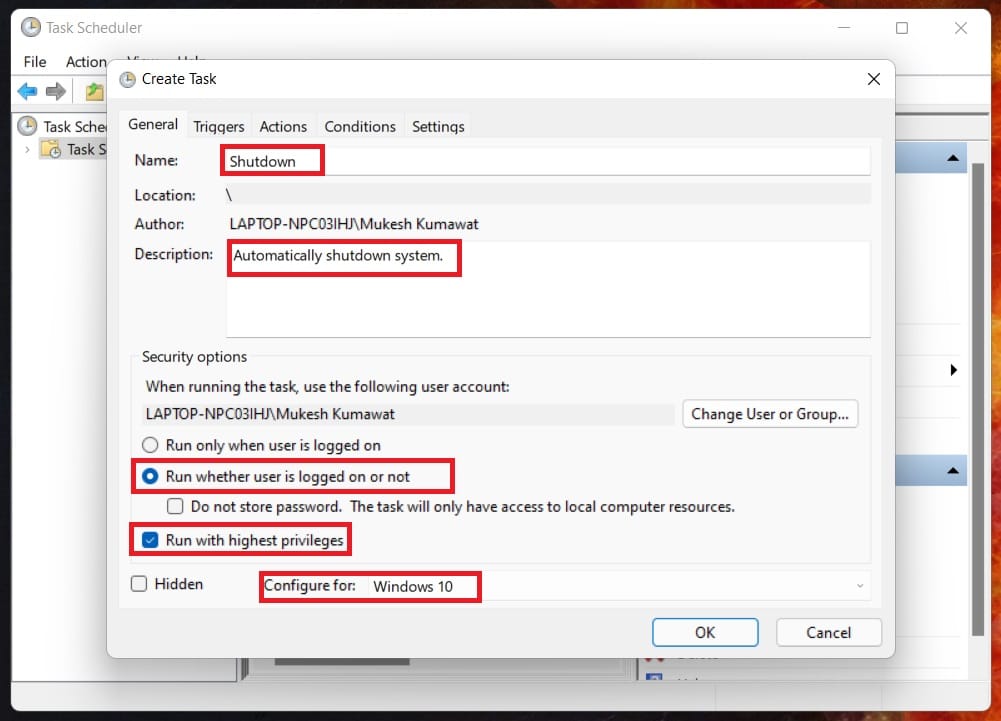
Now, at the General tab, you need to type Name for the task, Description (optional), select Run whether user is logged on or not and Run with highest privileges. Then select Configure for: Windows 10 or Windows 11 from the dropdown options as shown in the image below:
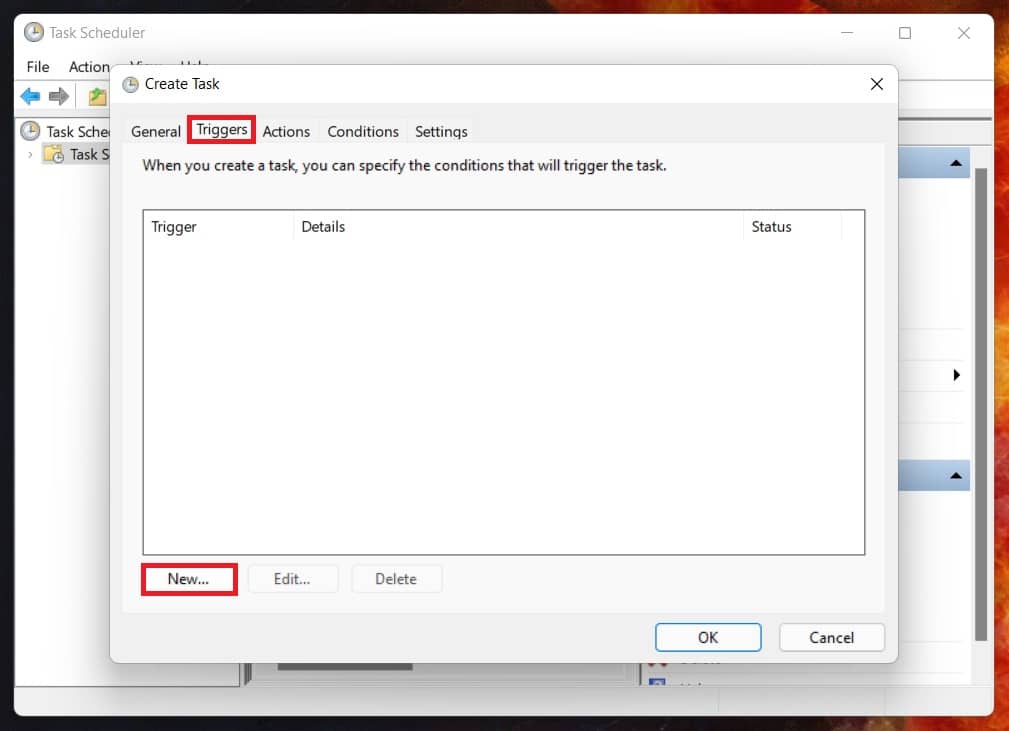
After that, select the Triggers tab and then click the on New… button as shown below:
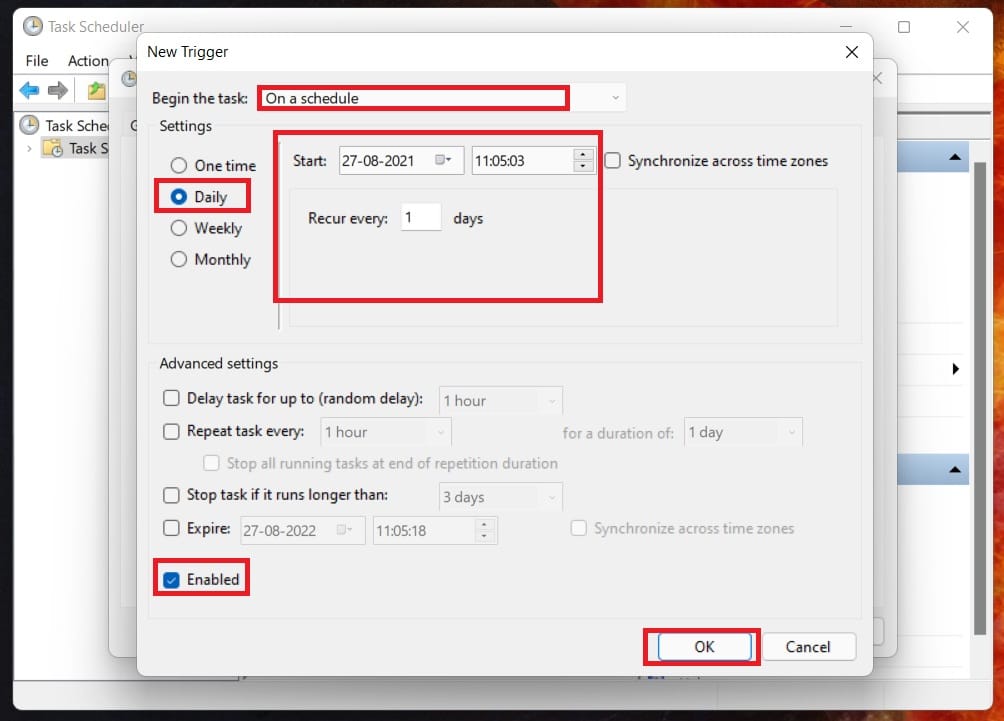
On the new Trigger pop up, select begin the task On a schedule, then select Daily for the task to run. set the Start date and time, and task recur every “1” days.
At the bottom, check the Enabled box to enable the task and click OK button to close the trigger settings.
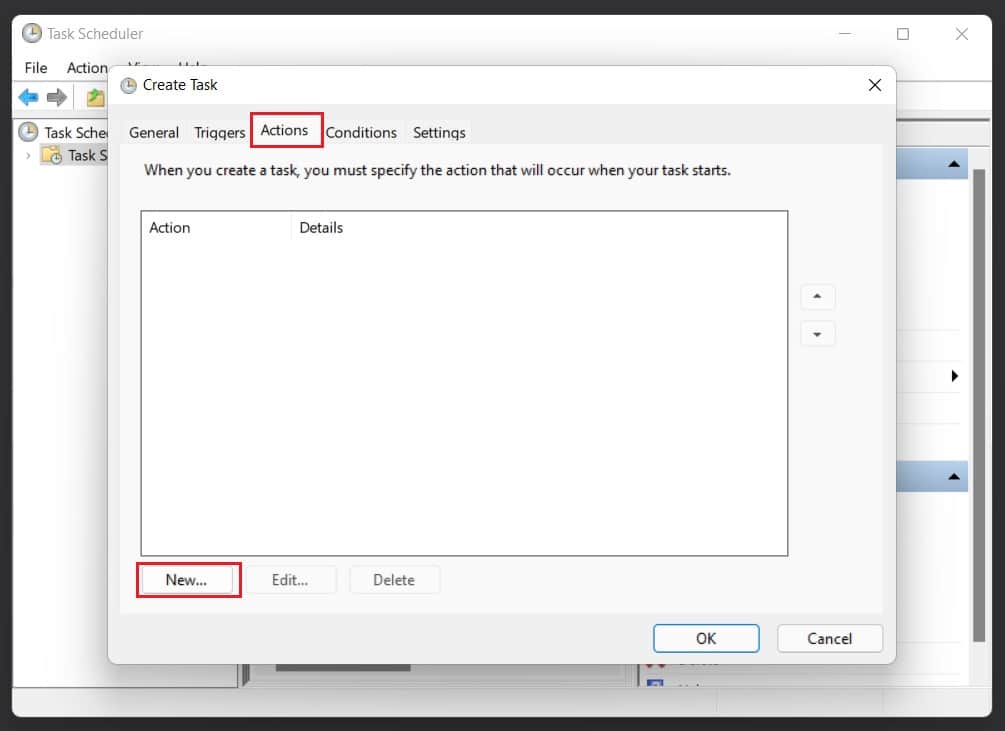
Next, select the Actions tab and then click the on New… button as shown below:
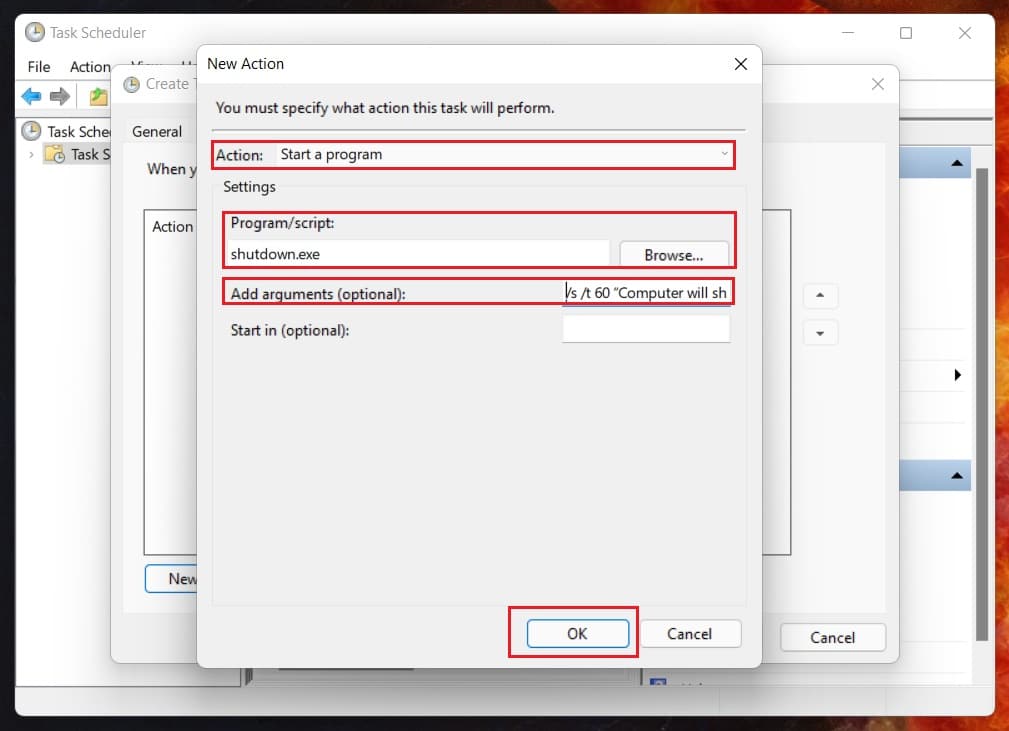
On the new actions pop up, select:
- Action : Start a program
- Program/script: shutdown.exe
- Add arguments (optional): /s /t 60 “Computer will shutdown in 60 seconds”
And click OK button to save and close action settings.
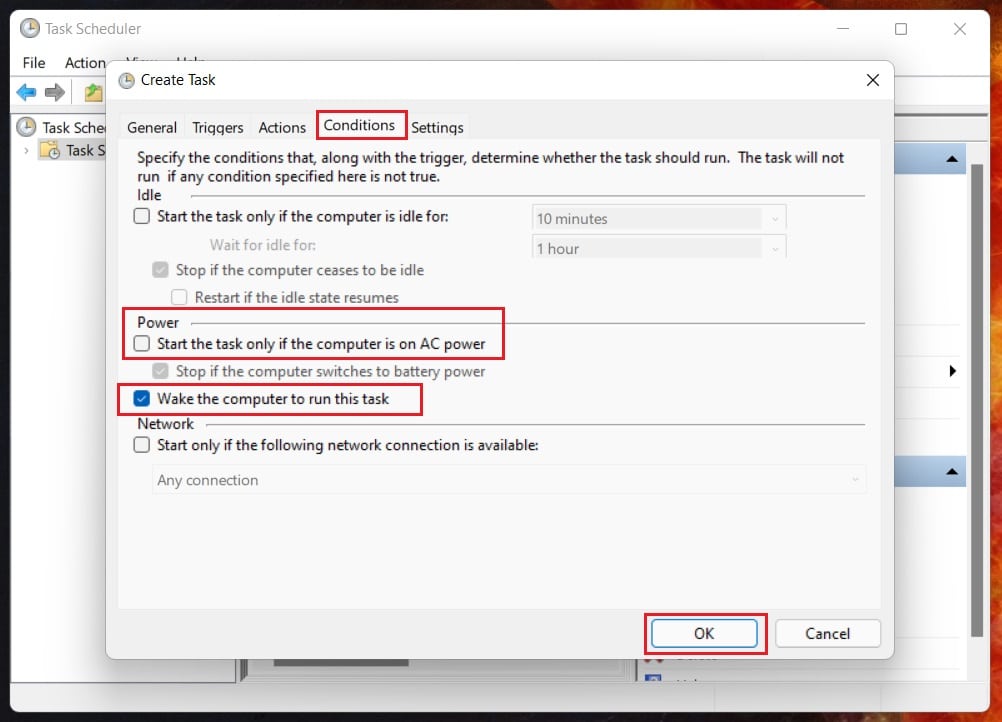
After that, select the Conditions tab. there uncheck the box for Start the task only if the computer is on AC power and check the box for Wake the computer to run this task.
And click OK button to save and exit.
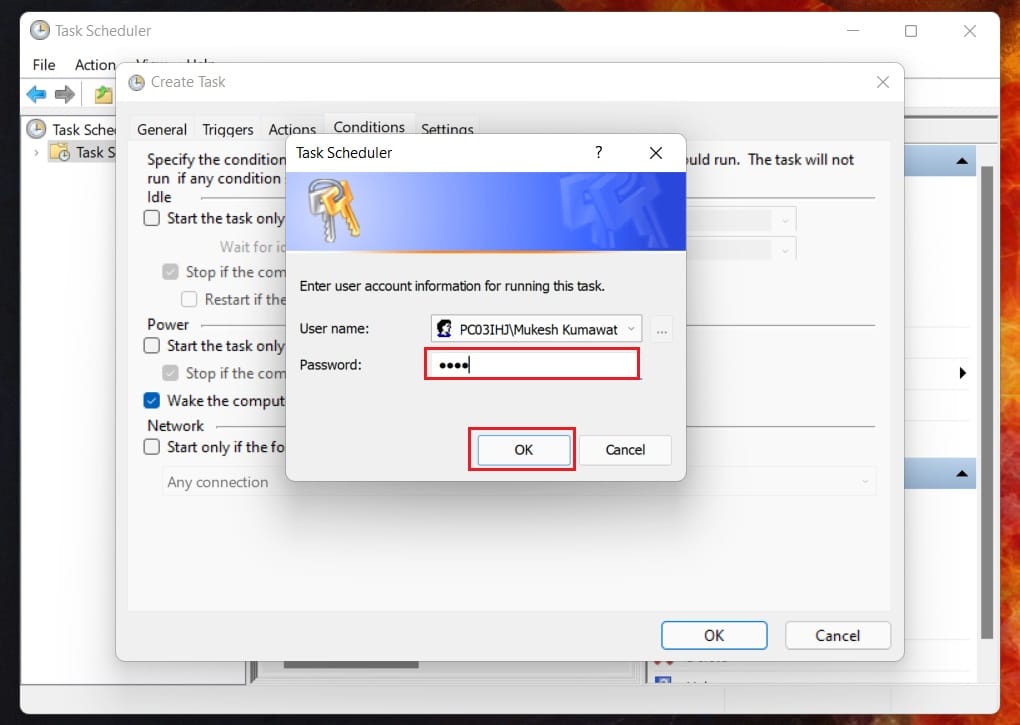
After click on OK button, you will be prompted to type your account password to save the task. So type your password and click on OK.
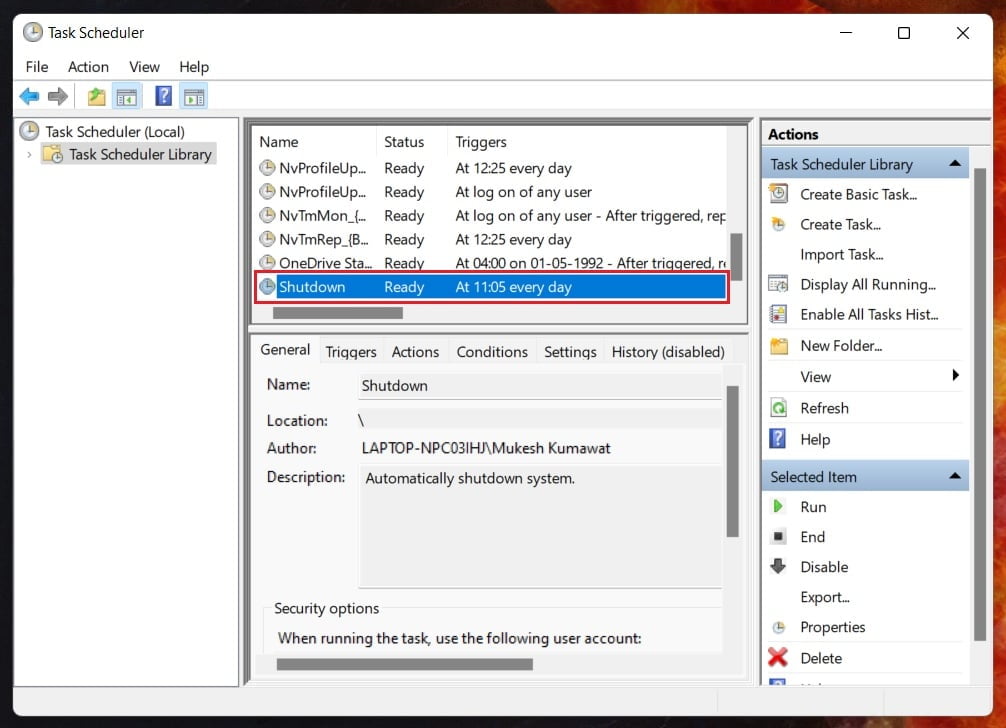
After password verification, your new task will be created:
That’s all.
If you face any error and issue in above steps , please use comment box below to report.
If our tutorials helped you, please consider buying us a coffee. We appreciate your support!
Thank you for your support.


