This post shows how to install WordPress on Windows 10 WSL (Windows Subsystem for Linux) with Nginx HTTP server on Ubuntu 18.04 | 20.04.
WordPress is the most popular blogging tool on the web and is used by millions of people around the world to create beautiful websites and blogs. It uses a Content Management System (CMS) allowing users to control their content in a simple and easy to use interface. It is completely customizable by the use of themes and plugins.
For more details about WordPress, please check its official website.
With the help of WSL, you can easily install full Linux operating system in your Windows 10 system. You just need to enable WSL (Windows Subsystem for Linux) in your Windows, install a Linux OS, install and run WordPress.
How to Install WordPress on Windows 10 WSL
Simply follow below steps to install WordPress on Windows 10 WSL with Nginx :
Step 1 : Enable WSL in Windows 10
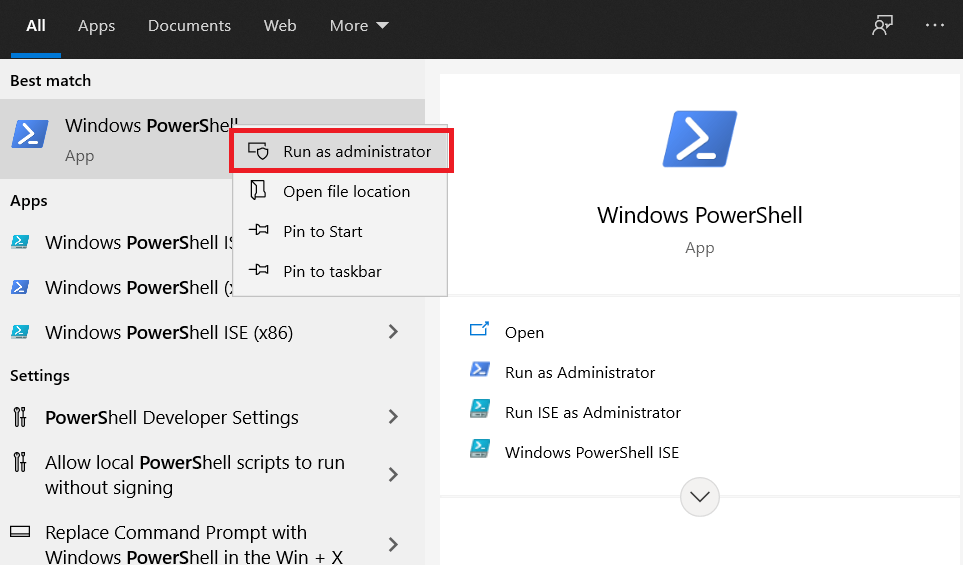
First of all, you will need to enable WSL in your Windows system. To enable it, simply open PowerShell terminal as administrator.
Click on Start icon -> search for PowerShell -> right-click Windows PowerShell app -> choose to run as administrator.
Next, run the command below in the Windows PowerShell console as show below:
dism.exe /online /enable-feature /featurename:Microsoft-Windows-Subsystem-Linux /all /norestartThe command above will display a successful message similar as below:
Deployment Image Servicing and Management tool
Version: 10.0.19041.844

Image Version: 10.0.19042.985

Enabling feature(s)
[==========================100.0%==========================]
The operation completed successfully.
Step 2 : Enable Virtual Machine Platform
Run the commands below from the same PowerShell console to enable the Virtual Machine platform in your Windows system:
dism.exe /online /enable-feature /featurename:VirtualMachinePlatform /all /norestartIf you have Windows 10 version lower than 2004 in your system, use the commands below:
Enable-WindowsOptionalFeature -Online -FeatureName VirtualMachinePlatform -NoRestartNext, restart your computer for changes to apply. If you forget to start then the below command doesn’t work.
After restart of your computer, launch the PowerShell as administrator again and run the commands below to set WSL 2 as the default version of WSL:
wsl --set-default-version 2Step 3 : Install Ubuntu in Windows 10
At this stage, WSL 2 is installed and ready to be used. So now you can easily install Linux operating system in your Windows 10 system.
Click the below button to download and install Ubuntu 20.04 LTS from Microsoft Windows store.

Click on the Get button to Download and Install Ubuntu. After installing Ubuntu, launch it from WSL environment.
After launching, it will install and prompt to create your account as show below :
Installing, this may take a few minutes...
Please create a default UNIX user account. The username does not need to match your Windows username.
For more information visit: https://aka.ms/wslusers
Enter new UNIX username: studiesonline
New password:
Retype new password:
passwd: password updated successfully
Installation successful!
To run a command as administrator (user "root"), use "sudo <command>".
See "man sudo_root" for details.

Welcome to Ubuntu 20.04.2 LTS (GNU/Linux 4.4.0-19041-Microsoft x86_64)

 * Documentation:  https://help.ubuntu.com
 * Management:     https://landscape.canonical.com
 * Support:        https://ubuntu.com/advantage
Use some troubleshooting commands when you get issues above. Run the below troubleshooting commands and launch Ubuntu again:
wsl --set-default-version 1
bcdedit /set hypervisorlaunchtype auto start
Step 4 : Install Nginx HTTP Server
To install Nginx HTTP on your Ubuntu server, run the commands below.
sudo apt update
sudo apt install nginx
Next, run the commands below to stop and start Nginx services:
sudo service nginx stop
sudo service nginx start
For check if Nginx server is installed or not, simply open your browser and type server IP or hostname.
If browser show result similar like below then Nginx is installed and working properly.
http://localhost
Step 5 : Install MariaDB Server
You will also need a database server to run WordPress and store its content. MariaDB database server is an open source, fast and secure database server that you can use with WordPress.
To install MariaDB database server, simply run the commands below:
sudo apt update
sudo apt install mariadb-server mariadb-client
Next, run the commands below to stop, start and enable MariaDB service to always start up with the server boots:
sudo service mysql stop
sudo service mysql start
Now, run the commands below to secure MariaDB server by creating a root password and disallowing remote root access.
sudo mysql_secure_installationWhen you run the above command, it will prompted to answer the questions as show below:
- Enter current password for root (enter for none): Just press the Enter
- Set root password? [Y/n]: Y
- New password: Enter password
- Re-enter new password: Repeat password
- Remove anonymous users? [Y/n]: Y
- Disallow root login remotely? [Y/n]: Y
- Remove test database and access to it? [Y/n]: Y
- Reload privilege tables now? [Y/n]: Y
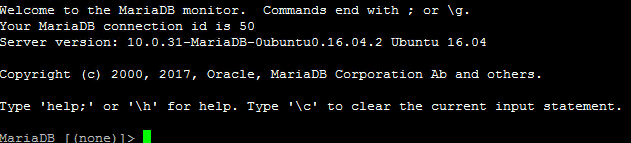
For check if MariaDB is installed and working, run the command below:
sudo mysql -u root -pWhen prompted, type the root password.
Step 6 : Install PHP and Related Modules
WordPress is completely based on PHP programming language, so PHP is must required to run WordPress. To install PHP and related modules, run the command below:
sudo apt install php-fpm php-common php-mysql php-gmp php-curl php-intl php-mbstring php-xmlrpc php-gd php-xml php-cli php-zipAfter installing the PHP and its related modules, run the command below to open PHP default config file and configure some basic settings:
sudo nano /etc/php/7.4/fpm/php.iniChange the below setting in the configuration file and save it:
file_uploads = On
allow_url_fopen = On
short_open_tag = On
memory_limit = 256M
cgi.fix_pathinfo = 0
upload_max_filesize = 100M
max_execution_time = 360
date.timezone = America/Chicago
These above lines are good settings to configure for most WordPress sites.
Next, runt the command below to stop and start PHP7.4 services:
sudo service php7.4-fpm stop
sudo service php7.4-fpm start
Step 7 : Create WordPress Database
To create WordPress database, first you will need to create a blank WordPress database. Simply run the command below to logon to MariaDB database server:
sudo mysql -u root -pNext, create a database named wpdb using command below:
CREATE DATABASE wpdb;Now, run the command below to create a database user named wpdbuser :
CREATE USER 'wpdbuser'@'localhost' IDENTIFIED BY 'your_new_password';Grant the newly created database user to the database by using command below:
GRANT ALL ON wpdb.* TO 'wpdbuser'@'localhost' WITH GRANT OPTION;Next, save your changes and exit:
FLUSH PRIVILEGES;
EXIT;
Step 8 : Download WordPress
Run the commands below to download the latest version of WordPress:
cd /tmp
wget https://wordpress.org/latest.tar.gz
tar -xvzf latest.tar.gz
sudo mv wordpress /var/www/wordpress
After that, you will need to allow www-data user to own the WordPress directory by using command below:
sudo chown -R www-data:www-data /var/www/wordpress/
sudo chmod -R 755 /var/www/wordpress/
Step 9 : Configure Nginx For WordPress Site
To configure Nginx for WordPress site, create a new configuration file named wordpress in the /etc/nginx/sites-available/ directory by running the commands below:
sudo nano /etc/nginx/sites-available/wordpressAfter create configuration file, copy and paste the below content into the configuration file and save it. Replace the highlighted line with your own domain name :
server {
    listen 80;
    listen [::]:80;
    root /var/www/wordpress;
    index  index.php index.html index.htm;
    server_name  example.com www.example.com;

    client_max_body_size 100M;
    autoindex off;

    location / {
        try_files $uri $uri/ /index.php?$args;
    }

    location ~ \.php$ {
         include snippets/fastcgi-php.conf;
         fastcgi_pass unix:/var/run/php/php7.4-fpm.sock;
         fastcgi_param SCRIPT_FILENAME $document_root$fastcgi_script_name;
         include fastcgi_params;
    }
}
Save the file and exit.
Next, run the command below to enable the new site:
sudo ln -s /etc/nginx/sites-available/wordpress /etc/nginx/sites-enabled/Restart the Nginx using command below:
sudo service nginx restartStep 10 : Launch WordPress
At this stage, WordPress is installed and ready to use. To launch it, open your favorite web browser and browse to the server domain name http://example.com.
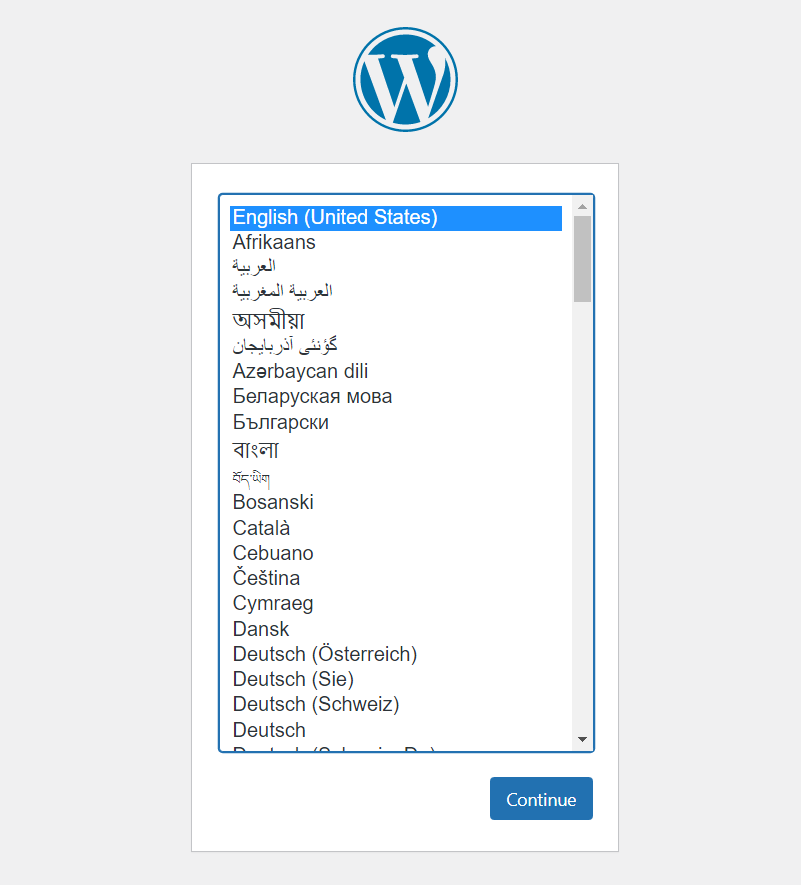
http://example.comIt will open the WordPress setup wizard screen.
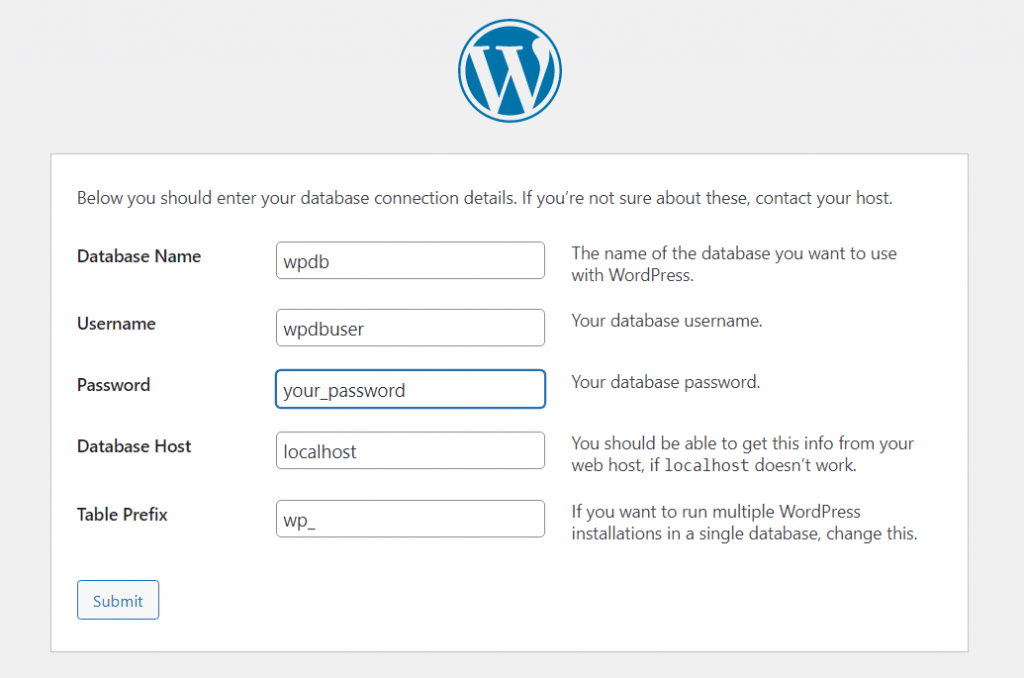
Next, provide the database information that created in above steps:
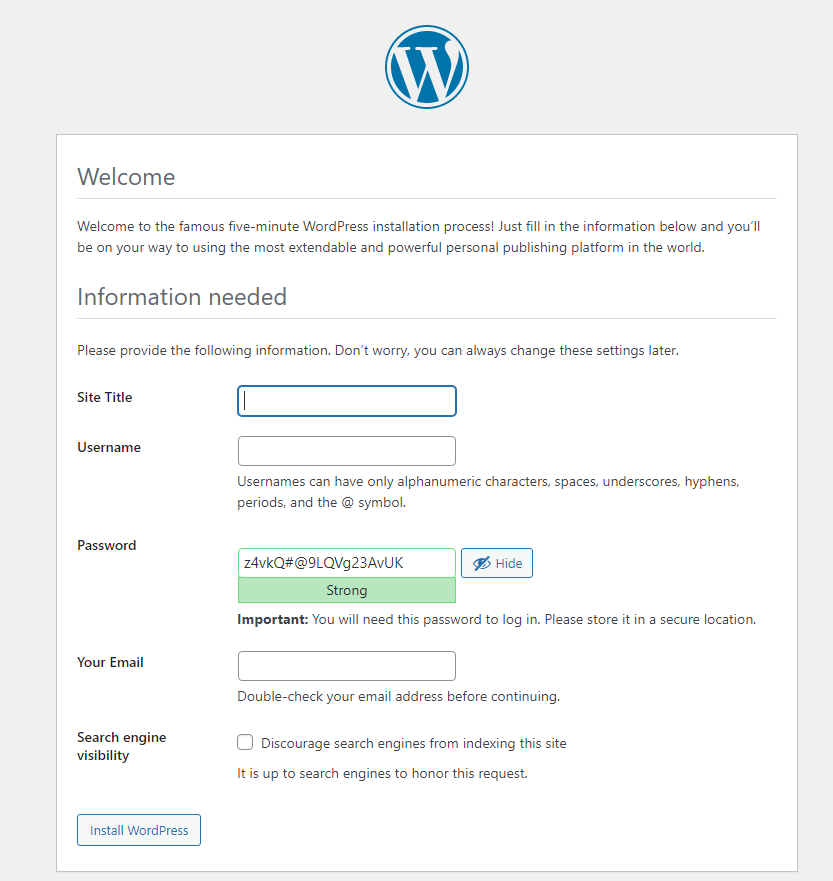
Next, create a WordPress admin account, then click on Install WordPress button to continue:
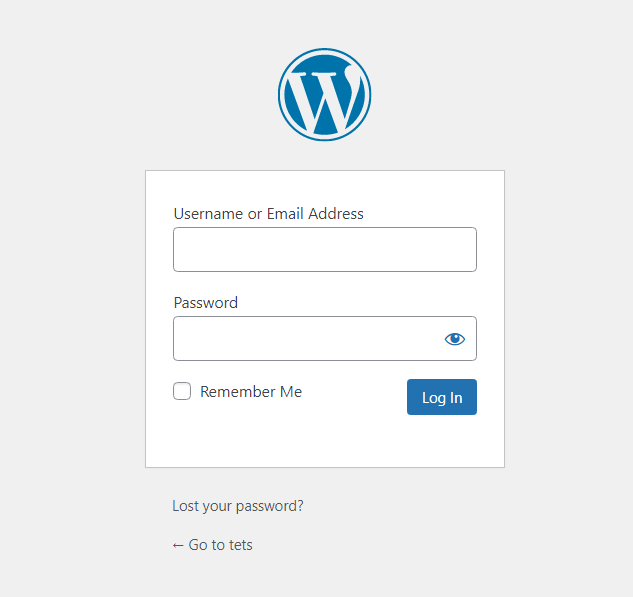
Finally, login with admin account created above:
That’s all
If you face any error and issue in above steps , please use comment box below to report.
If our tutorials helped you, please consider buying us a coffee. We appreciate your support!
Thank you for your support.