
In this post, we are going to show that how to Install TeamSpeak on Ubuntu 18.04 | 20.04. If your are going to Install TeamSpeak on your Ubuntu system then this post is ideal for you.
TeamSpeak is a cross-platform online communication system that is used for secure online audio communication between your friends, family member, groups and teammates.
It is mostly used by gamers to communicate with teammates with crystal clear sound, lag-free performance, military-grade security, unparalleled reliability and uptime. TeamSpeak is available for Windows, MacOS and Linux systems.
For more details about TeamSpeak, please visit its official website.
How to Install TeamSpeak on Ubuntu
Simply follow below steps to install TeamSpeak on your Ubuntu system:
Step 1 : Download TeamSpeak
To install TeamSpeak, first you will need to download its deb package from its official download page because TeamSpeak packages are not included in Ubuntu default repositories.
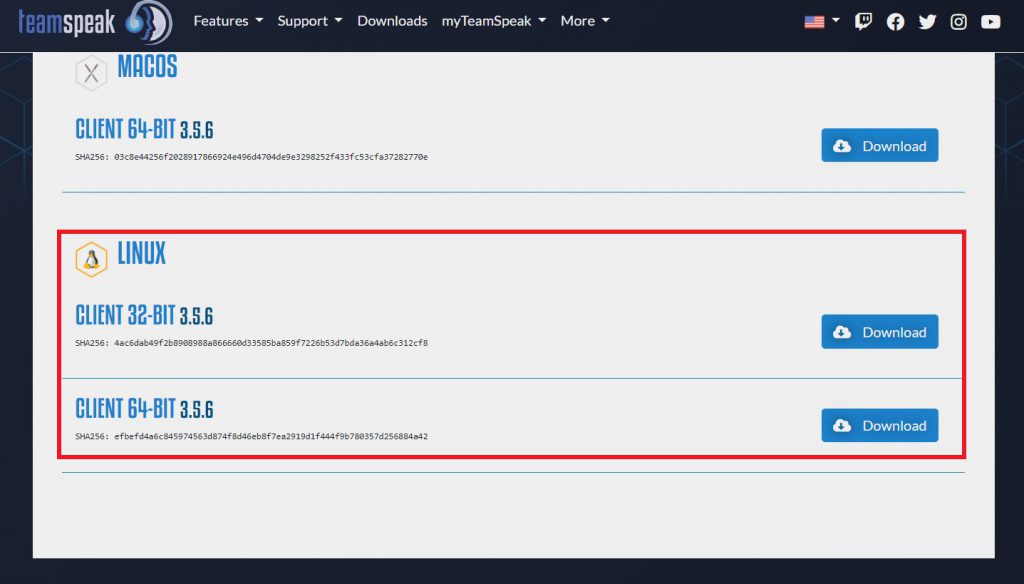
Visit its download page to download the latest version for Linux systems as show below:
As we know, all the downloaded files are saved in Downloads folder. So open your terminal and switch to the Downloads folder using command below :
cd ~/DownloadsStep 2 : Install TeamSpeak
First, run the command below to change the file permission to make it executable:
chmod u+x TeamSpeak3-Client-linux_*.runNext, run the commands below to install it:
./TeamSpeak3-Client-linux_*.runThe above command will launch the installation wizard.
Next you will need to accept its licensing terms. Press the enter button to view and read license file. At the end of license file, type y to accept its licensing terms:
Welcome to the TeamSpeak 3 Client for Linux on amd64 installer

In order to install this software you are required to accept the license
agreement, please press return to view the license.

You can scroll with the arrow keys and quit the viewer by pressing 'q'.
[RETURN]

Please type y to accept, n otherwise: y
The TeamSpeak installer uncompressed the file.
Step 3 : Setup Environment & Create Desktop Icon
First move the uncompressed TeamSpeak files to the /usr/local directory. To do that, run the command below:
sudo mv ~/Downloads/TeamSpeak3-Client-linux_amd64/ /usr/localNext, run the command below to create a file for desktop icon:
sudo nano ~/.local/share/applications/teamspeak3-client.desktopAfter that, copy and paste the below lines into the icon file as show below:
[Desktop Entry]
 Name=Teamspeak 3 Client
 GenericName=Teamspeak
 Comment=Speak with friends
 Comment=Speak with friends
 Exec=/usr/local/TeamSpeak3-Client-linux_amd64/ts3client_runscript.sh Terminal =>
 X-MultipleArgs=false
 Type=Application
 Icon=/usr/local/TeamSpeak3-Client-linux_amd64/styles/default/logo-128x128.png
 StartupWMClass=TeamSpeak 3
 StartupNotify=true
After made the changes, save and exit the file.
Step 4 : Launch TeamSpeak
At this point, the TeamSpeak installed and ready to use. Simply go to the Activities Overview –> Dashboard and search for TeamSpeak and launch it.
That’s all.
If you face any error and issue in above steps , please use comment box below to report.
If our tutorials helped you, please consider buying us a coffee. We appreciate your support!
Thank you for your support.

