
In this post, we are going to show that how to Install ProjectSend on Ubuntu 18.04 | 20.04. If your are going to Install ProjectSend on your Ubuntu system then this post is ideal for you.
ProjectSend(previously cFTP) is a free, open-source, user friendly and self-hosted file uploading tool that is used for file-sharing with your clients. It is written in PHP programing language.
ProjectSend Features:
- It is provides Real-time statistics
- Create client groups
- self-registration and social login
- Sortable full lists of files, users and clients.
- Custom E-mail templates
- Unlimited file size uploading
- Can be translated easily via .po files
How to Install ProjectSend on Ubuntu
Simply follow below steps to install ProjectSend on your Ubuntu:
Step 1 : Install Nginx
To install Nginx on your Ubuntu server, run the commands below.
sudo apt update
sudo apt install nginx
Next, run the commands below to stop, start and enable Nginx service to always start up with the server boots:
sudo systemctl stop nginx.service
sudo systemctl start nginx.service
sudo systemctl enable nginx.service
For check if Nginx server is installed or not, simply open your browser and type server IP or hostname.
If browser show result similar like below then Nginx is installed and working properly.
http://localhost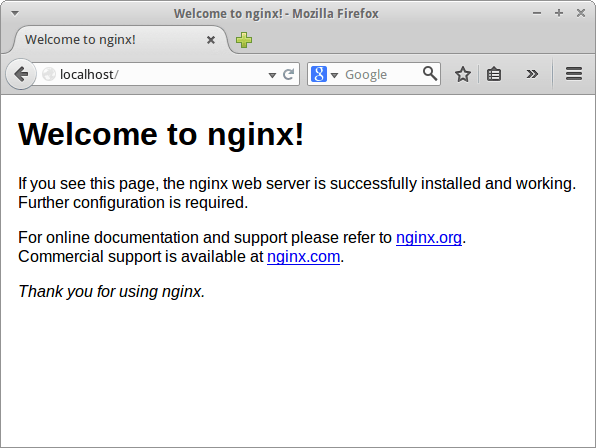
Step 2 : Install MariaDB Database Server
To install MariaDB database, simply run the commands below:
sudo apt update
sudo apt install mariadb-server mariadb-client
Next, run the commands below to stop, start and enable MariaDB service to always start up with the server boots:
sudo systemctl stop mariadb.service
sudo systemctl start mariadb.service
sudo systemctl enable mariadb.service
Now, run the commands below to secure MariaDB server by creating a root password and disallowing remote root access.
sudo mysql_secure_installationWhen you run the above command, it will prompted to answer the questions as below:
- Enter current password for root (enter for none): Just press the Enter
- Set root password? [Y/n]: Y
- New password: Enter password
- Re-enter new password: Repeat password
- Remove anonymous users? [Y/n]: Y
- Disallow root login remotely? [Y/n]: Y
- Remove test database and access to it? [Y/n]: Y
- Reload privilege tables now? [Y/n]: Y
Now, Restart the MariaDB server using below command:
sudo systemctl restart mariadb.serviceFor check if MariaDB is installed or Not, run the command below:
sudo systemctl status mariadb.serviceStep 3 : Install PHP 7.4-FPM and Related Modules
For install PHP 7.4-FPM, you will need to get it from third-party repositories because PHP 7.4-FPM not includes in Ubuntu default repositories. Simply run the command below to add the third party repository:
sudo apt-get install software-properties-common
sudo add-apt-repository ppa:ondrej/php
Now update and upgrade to PHP 7.4 by using command below:
sudo apt updateNext, run the commands below to install PHP 7.4-FPM and its related modules:
sudo apt install php7.4-fpm php7.4-common php7.4-curl php7.4-intl php7.4-mbstring php7.4-xmlrpc php7.4-mysql php7.4-gd php7.4-xml php7.4-cli php7.4-zip imagemagick php-imagick php7.4-bz2 php7.4-bcmath php7.4-gmpAfter finished installing of PHP 7.4 and its related modules, run the command below to open PHP default config file for Nginx server:
sudo nano /etc/php/7.4/fpm/php.iniAfter open the configuration file, Changes the following below lines in the default configuration file and save it:
file_uploads = On
allow_url_fopen = On
short_open_tag = On
memory_limit = 256M
cgi.fix_pathinfo = 0
upload_max_filesize = 100M
max_execution_time = 360
date.timezone = America/Chicago
Step 4: Create ProjectSend Database
To create ProjectSend database, first you will need to create a blank ProjectSend database. Simply run the command below to logon to MariaDB database server:
sudo mysql -u root -pNext, create a database named projectsend using command below:
CREATE DATABASE projectsend;Now, run the command below to create a database user named projectsenduser :
CREATE USER 'projectsenduser'@'localhost' IDENTIFIED BY 'your_new_password';Grant the newly created database user to the database by using command below:
GRANT ALL ON projectsend.* TO 'projectsenduser'@'localhost' WITH GRANT OPTION;Next, save your changes and exit:
FLUSH PRIVILEGES;
EXIT;
Step 5 : Download and Install ProjectSend
You can download ProjectSend package from its official download page or you can download it using command line.
To download it using command line, run the commands below:
cd /tmp
sudo wget -O projectsend.zip https://www.projectsend.org/download/387/
sudo mkdir -p /var/www/projectsend
sudo unzip projectsend.zip -d /var/www/projectsend/
Next, you will need to create ProjectSend configuration file using the command below:
sudo cp /var/www/projectsend/includes/sys.config.sample.php /var/www/projectsend/sys.config.phpNow, run the commands below to open newly created configuration file:
sudo nano /var/www/projectsend/sys.config.phpAfter open the configuration file, make the following below highlighted changes in the default configuration file:
/**
 Database driver to use with PDO.
 Possible options: mysql, mssql
 */
 define('DB_DRIVER', 'mysql');
 /** Database name */
 define('DB_NAME', 'projectsend');
 /** Database host (in most cases it's localhost) */
 define('DB_HOST', 'localhost');
 /** Database username (must be assigned to the database) */
 define('DB_USER', 'projectsenduser');
 /** Database password */
 define('DB_PASSWORD', 'database_user_password');
 /**
 Prefix for the tables. Set to something other than tbl_ for increased
 security onr in case you want more than 1 installations on the same database.
Save the configuration file and exit.
Next, you will need to change the root folder permissions. To do that, run the command below:
sudo chown -R www-data:www-data /var/www/projectsend/
sudo chmod -R 755 /var/www/projectsend/
Step 6 : Configure Nginx for ProjectSend Site
To configure Nginx for ProjectSend site, you will create a new configuration file named projectsend.conf. To do that, run the commands below:
sudo nano /etc/nginx/sites-available/projectsend.confAfter create configuration file, copy and paste the below content into the configuration file and save it. Replace the highlighted line with your own domain name and directory root location:
server {
    listen 80;
    listen [::]:80;

    server_name  example.com www.example.com;
    root   /var/www/projectsend;
    index  index.php;

    access_log /var/log/nginx/example.com.access.log;
    error_log /var/log/nginx/example.com.error.log;

    client_max_body_size 100M;

    autoindex off;

    location / {
        try_files $uri $uri/ /index.php;
    }

    location ~ \.php$ {
         include snippets/fastcgi-php.conf;
         fastcgi_pass unix:/var/run/php/php7.4-fpm.sock;
         fastcgi_param SCRIPT_FILENAME $document_root$fastcgi_script_name;
         include fastcgi_params;
    }
}
Save the configuration file and exit.
After that, run the command below to enable VirtualHost:
sudo ln -s /etc/nginx/sites-available/projectsend.conf /etc/nginx/sites-enabled/Next, restart the Nginx using command below:
sudo systemctl restart nginx.serviceNow open your favorite web browser and browse to the server domain name http://example.com.
http://example.comIt will open the ProjectSend setup wizard screen as show below:
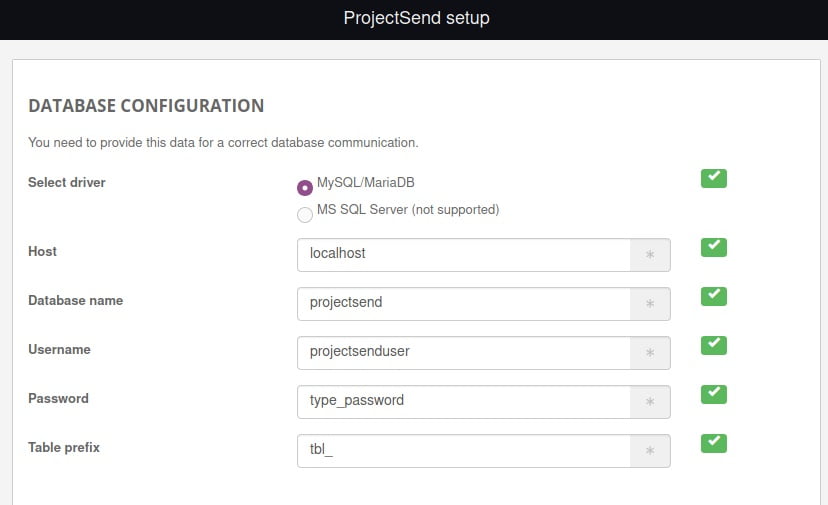
At the setup wizard screen, enter the database name, database username and password and continue.
That’s all
If you face any error and issue in above steps , please use comment box below to report.
If our tutorials helped you, please consider buying us a coffee. We appreciate your support!
Thank you for your support.

