
In this article, we are going to shows that how to Install Pritunl VPN Server on Ubuntu 18.04 | 20.04.
Pritunl VPN is a free and open-source enterprise VPN server that is designed and developed to help businesses deploy and remotely send, receive & access private data across the multiple networks.
Pritunl provides a graphical web interface that is simple, powerful, easy to use and works with other open source VPN servers like OpenVPN, WireGuard and many others.
Install Pritunl VPN Server on Ubuntu 18.04 | 20.04
Simply follow below steps to Install Pritunl VPN Server on Ubuntu 18.04 | 20.04:
Step 1 : Update Ubuntu and Install Required Packages
Before starting to install Pritunl VPN Server, first you will need to install some packages on your Ubuntu.
To update Ubuntu and install these packages, run the commands below:
sudo apt update
sudo apt install curl gnupg2 wget unzip
Step 2 : Install Pritunl VPN Server
After update Ubuntu and install required packages, now you will need to add Pritunl repository key and file to Ubuntu.
First add Pritunl repository public key by running below command:
sudo apt-key adv --keyserver hkp://keyserver.ubuntu.com --recv E162F504A20CDF15827F718D4B7C549A058F8B6B
sudo apt-key adv --keyserver hkp://keyserver.ubuntu.com --recv 7568D9BB55FF9E5287D586017AE645C0CF8E292A
Next, add its repository file using command below:
echo "deb http://repo.pritunl.com/stable/apt focal main" | sudo tee /etc/apt/sources.list.d/pritunl.list
Now, run the commands below to install Pritunl:
sudo apt update
sudo apt install pritunl
Run the commands below to start, stop and enable Pritunl VPN server:
sudo systemctl stop pritunl
sudo systemctl start pritunl
sudo systemctl enable pritunl
Run the commands below to check the status of Pritunl VPN server:
sudo systemctl status pritunl
Step 3 : Install MongoDB
MongoDB packages are not available in Ubuntu default repository. To add its repository key and file, run the command below:
curl -fsSL https://www.mongodb.org/static/pgp/server-4.4.asc | sudo apt-key add -
echo "deb [ arch=amd64,arm64 ] https://repo.mongodb.org/apt/ubuntu focal/mongodb-org/4.4 multiverse" | sudo tee /etc/apt/sources.list.d/mongodb-org-4.4.list
After add its repository key and repository file, run the command below to install MongoDB:
sudo apt update
sudo apt-get install mongodb-server
Step 4 : Access and Configure Pritunl
To access Pritunl, Open your browser and browse to the http://SERVER-IP or http://localhost:
http://localhost
When you browse, it will open a page as below:
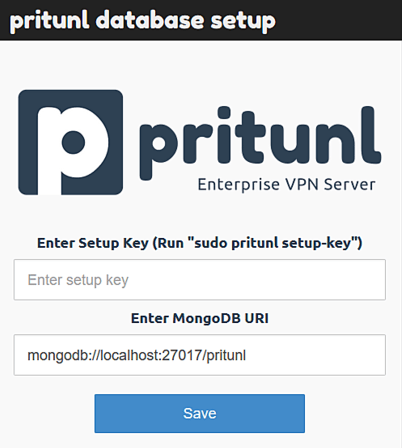
Next, generate a setup key using the command below:
sudo pritunl setup-key
The above command display a output with setup key similar like below:
 from cryptography import x509
c879d9o59b584b9584887b2g4ua5g49u
Copy the setup key and paste it to the Pritunl database setup wizard. After paste setup key, click on the save button.
After click on save button, a new screen will open same as below;
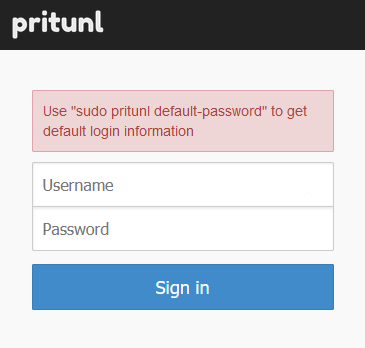
Next, you will need to generate default username and password to sign in. To do that, run the command below:
sudo pritunl default-password
The above command display a output with default username and password similar as below:
Administrator default password:
  username: "pritunl"
  password: "dI3dNsfKRcY3"
Login with default username and password, and setting up your environment from Pritunl dashboard.
Run the commands below to improve performance of Pritunl VPN Server by increase the open file limit on the server:
sudo sh -c 'echo "* hard nofile 64000" >> /etc/security/limits.conf'
sudo sh -c 'echo "* soft nofile 64000" >> /etc/security/limits.conf'
sudo sh -c 'echo "root hard nofile 64000" >> /etc/security/limits.conf'
sudo sh -c 'echo "root soft nofile 64000" >> /etc/security/limits.conf'
Pritunl Command line Tool
1. View or check Version
Run the command below to check which version of Pritunl:
$ sudo pritunl version
2. Repair Database
Run the command below to Repair Database:
$ sudo systemctl stop pritunl
$ sudo pritunl repair-database
$ sudo systemctl start pritunl
3. Reset Password
To reset the password, run the command below:
$ sudo pritunl reset-password
That’s all.
If you face any error and issue in above steps , please use comment box below to report.

