This post shows users and new students that How to Install Nginx on Ubuntu 20.04 | 18.04 | 16.04.
NGINX is a free, open-source, high-performance HTTP server and reverse proxy, as well as an IMAP/POP3 proxy server. NGINX is known for its high performance, stability, rich feature set, simple configuration, and low resource consumption.
Installing Nginx on Ubuntu is simple and straightforward, Nginx packages are available in Ubuntu repositories.
To Install Nginx on Ubuntu 20.04 | 18.04, follow the steps below:
Step 1: Install Nginx
Simply run the commands below to install.
sudo apt update
sudo apt install nginx
After installing the package, check Nginx status by running the commands below:
sudo systemctl status nginxAfter run the above command it should display similar lines as shown below:
nginx.service - A high performance web server and a reverse proxy server
Loaded: loaded (/lib/systemd/system/nginx.service; enabled; vendor preset: enabl>
Active: active (running) since Fri 2020-05-01 22:44:46 CDT; 10s ago
Docs: man:nginx(8)
Main PID: 3361 (nginx)
Tasks: 2 (limit: 4657)
Memory: 3.2M
CGroup: /system.slice/nginx.service
├─3361 nginx: master process /usr/sbin/nginx -g daemon on; master_proces>
└─3362 nginx: worker process
Step 2: Managing Nginx
When you install Nginx, it might be good to how to manage the server’s services. To learn how to stop,start, restart Nginx services, the commands below will be helpful.
For stop Nginx services, run the commands below:
sudo systemctl stop nginxTo start it, run the commands below:
sudo systemctl start nginxTo restart it, run the commands below:
sudo systemctl restart nginxReload allows you to apply new configuration changes without restarting the services.
sudo systemctl reload nginxIf Ubuntu server is protected by a firewall you’ll need to open HTTP 80 and HTTP 443 ports to allow communication to the Nginx.
Assuming you’re using Ubuntu default firewall, run the commands below:
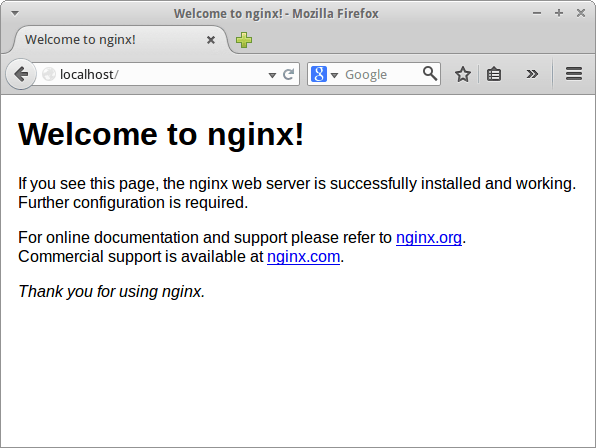
sudo ufw allow 'Nginx Full'To validate that Nginx is working, open your web browser and browse to the server IP address or hostname.
http://localhostIf you see a similar page below, then Nginx is working as expected.

Step 3: Important Locations
By default, these important locations are automatically created on Ubuntu servers. Below are some details of each location.
All Nginx configuration files are located in: /etc/nginx directory.
Nginx main configuration file is at /etc/nginx.
Each website will be hosted as a server block file. All server block files are stored in /etc/nginx/sites-available.
Server block files in the location above will not be enabled unless they’re linked in this directory: /etc/nginx/sites-enabled.
To simplify Nginx management, you should create a separate configuration file for each domain. You can have as many server block files as you need.
Configuration snippets that can be included in Nginx site configuration file are created in /etc/nginx/snippets.
For activate a server block, run the commands below:
sudo ln -s /etc/nginx/sites-available/example.com.conf /etc/nginx/sites-enabled/
For disable, run the commands below
sudo rm /etc/nginx/sites-enabled/example.com.conf
That should be a good started point.
More configurations and files are available in the main configuration directory. Look them up, read about them and use them.


