This article shows users and new students that how to Install KVM on Ubuntu 18.04 | 20.04. If you are going to Install KVM on Ubuntu then this post is ideal for you.
Kernel-based Virtual Machine (KVM) is an open source virtualization solution for Linux kernel that allows the kernel to function as a hypervisor.
If you can not install VirtualBox or VMware Workstation on Ubuntu, then you can try KVM virtualization solutions. After installing KVM, use the KVM module to install and run multiple virtual machines on Linux servers.
For more details about KVM, please go to its official website.
Follow the below steps for starting to Install KVM on Ubuntu 18.04 | 20.04 :
Step 1: Check your System
You can not install and run KVM Modules on all systems. If you are running a server that is not compatible with KVM then you can’t used it on your server.
To check server compatibility, simply run the below command to install server(CPU) checker tool:
sudo apt install cpu-checker
sudo kvm-ok
When you run above command, it will check CPU compatibility with KVM, If KVM is compatible with your server then you get a message similar as below:
KVM acceleration can be used
And if KVM is not compatible with your server, then you will get a message similar as below:
INFO: Your CPU does not support KVM extensions
KVM acceleration can NOT be used
Step 2: Install KVM Packages
If your server is compatible with KVM then run the below commands to install KVM packages:
sudo update
sudo apt install qemu qemu-kvm libvirt-bin  bridge-utils  virt-manager
Run the below commands for start and enable it to automatically startup when the system boots.
sudo systemctl start libvirtd
sudo systemctl enable libvirtd
Step 3: Configure Network Bridge for the KVM Virtual Machine
KVM requires network bridge for its virtual guest machines. So run the below commands to open Ubuntu network config file for create a new network bridge.
sudo nano /etc/netplan/50-cloud-init.yaml
After run the above command, add a new bridge section [highlighted] into the file and save it.
network:
  ethernets:
    enp0s3:
      dhcp4: no
      dhcp6: no
  version 2

  bridges:
    br0:
      interfaces: [enp0s3]
      dhcp4: no
      dhcp6: no
      addresses: [172.168.0.10/24]
      gateway4: 172.168.0.1
      nameservers:
        addresses: [172.168.0.1]
Save the config file and exit it.
To apply the change, simply run the below commands.
sudo netplan apply
sudo netplan --debug  apply
Continue below for start creating your New Virtual Machine.
Step 4: Create New Virtual Machine
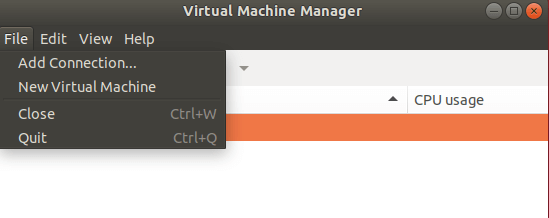
For creating New Virtual Machine, please open KVM manager and connect to the server, then create a new machine by click on New Virtual Machine option.

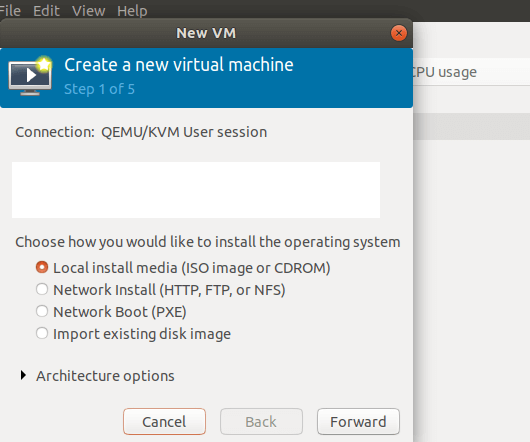
Now choose, which method you are going to use for install KVM. you can use options local Install ( ISO image or CDROM ) or via network Boot / PXE install.

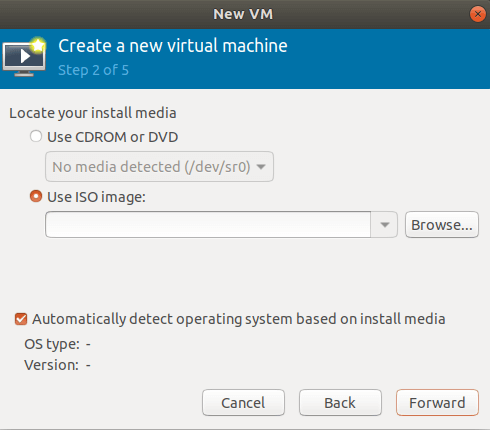
In this post we are going to be installing Ubuntu via local Install Media ( ISO image ), So browse for the ISO file :

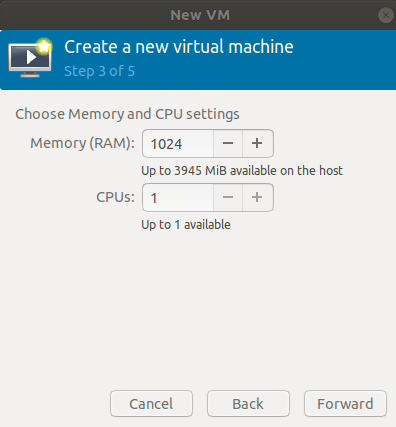
After choosing the OS file, Now create a setup local disk, system memory and other required settings.

Now, boot the Virtual Machine to install Ubuntu server.

That’s all
If you find any error and issue in above steps , please use comment box below to report.


