
In this article, we are going to shows that how to Install CloudPanel on Ubuntu 18.04 | 20.04.
CloudPanel is an opensource and PHP based server management control panel that is built for manage hosted services including Linux services, Cron jobs, email, domain, FTP services, User management, Cloud platforms support and many others.
It is designed to be fast, easy to use and customizable. with the help of it you can get free and open-source software, management panel, Nginx support and many more.
CloudPanel is only designed and built for Debian. it doesn’t fully support Ubuntu operating system but the help of steps below you can easily get it in Ubuntu.
Install CloudPanel on Ubuntu 18.04 | 20.04
Simply follow below steps to Install CloudPanel on Ubuntu 18.04 | 20.04:
Step 1 : Prerequisites
Before installing the CloudPanel, you will need to update Ubuntu and install some required packages in your Ubuntu machine. To install them, run the commands below:
sudo apt update
sudo apt upgrade
sudo apt install curl wget sudo
Step 2 : Install Postfix Mail Transport Agent
Run the command below to install Postfix on Ubuntu:
sudo apt install gnupg apt-transport-https
sudo apt install postfix
When you run the above, it will prompt to select the Postfix configuration settings. You need to Choose Internet Site as show below:
               ┌──────┤ Postfix Configuration ├───────┐
               │ General type of mail configuration:  │
               │                                      │
               │       No configuration               │
               │       Internet Site                  │
               │       Internet with smarthost        │
               │       Satellite system               │
               │       Local only                     │
               │                                      │
               │                                      │
               │       <Ok>           <Cancel>        │
               │                                      │
               └──────────────────────────────────────┘
After select the Postfix configuration settings, you will prompted again to enter your mail server. For as an example, here we are using mail.example.com as mail server. You can replace it with your mail server.
Step : 3 Install Other required repositories
Add Node.js repository
Run the commands below to add Node.js repository:
curl -s https://deb.nodesource.com/gpgkey/nodesource.gpg.key | sudo apt-key add -curl -sS https://dl.yarnpkg.com/debian/pubkey.gpg | sudo apt-key add -echo 'deb https://deb.nodesource.com/node_14.x focal main' | sudo tee /etc/apt/sources.list.d/nodesource.listecho 'deb https://dl.yarnpkg.com/debian/ stable main' | sudo tee /etc/apt/sources.list.d/yarn.listAdd PHP repository
Run the commands below to add PHP repository:
sudo add-apt-repository ppa:ondrej/php
sudo apt-get update
Add Percona repository
Run the commands below to add Percona repository:
wget https://repo.percona.com/apt/percona-release_latest.$(lsb_release -sc)_all.deb
sudo apt install ./percona-release_latest.$(lsb_release -sc)_all.deb
sudo percona-release setup ps57
Step 4 : Install CloudPanel Dependencies
Now you will need to install some dependencies to support CloudPanel. To install them, run the commands below:
cd /tmp
wget http://ftp.us.debian.org/debian/pool/main/s/startpar/startpar_0.64-3_amd64.deb
wget http://ftp.us.debian.org/debian/pool/main/s/sysvinit/sysvinit-utils_2.96-6_amd64.deb
wget http://ftp.us.debian.org/debian/pool/main/l/lsb/lsb-base_11.1.0_all.deb
wget http://ftp.us.debian.org/debian/pool/main/i/insserv/insserv_1.21.0-1_amd64.deb
wget http://ftp.us.debian.org/debian/pool/main/s/sysvinit/sysv-rc_2.96-6_all.deb
wget http://ftp.us.debian.org/debian/pool/main/r/rcconf/rcconf_3.2+nmu1_all.deb
sudo dpkg -i *.deb
Step 5 : Install CloudPanel
To install CloudPanel in your Ubuntu, first you will need to add the CloudPanel’s Debian Buster repository to Ubuntu by using below command:
echo "deb https://d17k9fuiwb52nc.cloudfront.net/ buster main" | sudo tee /etc/apt/sources.list.d/packages.cloudpanel.io.list
sudo curl -Lks https://d17k9fuiwb52nc.cloudfront.net/key.gpg | sudo apt-key add -
sudo apt update
Now run the command below to download cloudpanel package:
wget https://github.com/cloudpanel-io/cloudpanel-ce/releases/download/v1.0.5/cloudpanel.debNext, install the CloudPanel by runnig command below:
sudo apt install ./cloudpanel.debWhen you run the command above, it will prompt to create a root user password. Set your root user password and confirm it.
If you face any error during the installation, then you can fix failed installation by running below command:
sudo apt install -fStep 6 : Access CloudPanel Dashboard
To access CloudPanel dashboard, open your web browser and browser to the below URL:
https://localhost:8443OR
https://[YourServerIP]:8443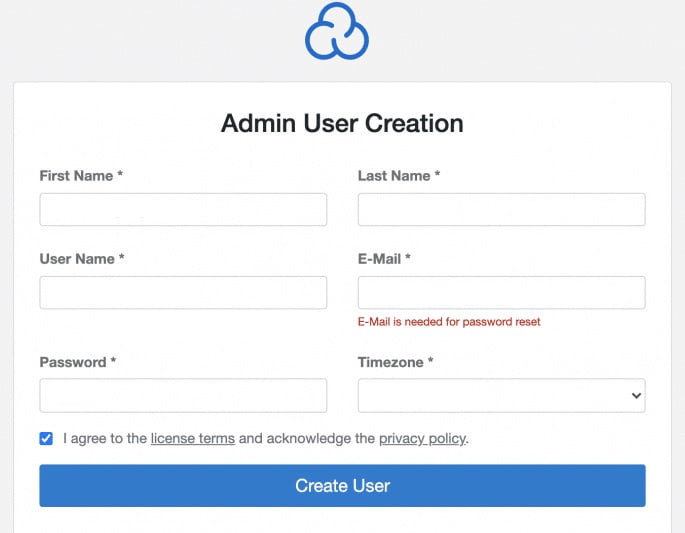
That’s all
If you face any error and issue in above steps , please use comment box below to report.


Getting the below error while installing on ubuntu 18.04
Reading state information… Done
Note, selecting ‘cloudpanel’ instead of ‘./cloudpanel.deb’
Some packages could not be installed. This may mean that you have
requested an impossible situation or if you are using the unstable
distribution that some required packages have not yet been created
or been moved out of Incoming.
The following information may help to resolve the situation:
The following packages have unmet dependencies:
cloudpanel : Depends: rcconf but it is not installable
E: Unable to correct problems, you have held broken packages.