
In this article, we are going to shows how to install Askbot on Ubuntu 20.04 | 18.04. If you are interested to install Askbot on Ubuntu then this post is ideal for you.
Askbot is an open source question and answer (Q&A) software for creating Q&A forum that is built on Python and Django Framework. With the help it, you can easily setup your own Q&A platform similar to StackOverflow and Yahoo Answers.
It was developed by Mike Chan and Sailing Cai in 2009, and it is easy to install and configure on Linux systems including Ubuntu. It is also comes with some good features like a karma-based system, user control with reward systems, voting, best answers being shown first, content moderation and categorized by tags.
How to Install Askbot on Ubuntu
Simply follow below steps to install Askbot question and answer platform on Ubuntu:
Step 1 : Install Required Dependencies
To install Askbot, first you will need to install python packages and pip package manager by running command below:
sudo apt update
sudo apt install python-dev python-setuptools python3-pip python3-psycopg2 libpq-dev
Step 2 : Install PostgreSQL Database Server
Askbot support many database servers like MySQL, SQLite, and PostreSQL. For this tutorial we will install PostgreSQL Database Server. To install it, run the command below:
sudo apt install postgresql postgresql-clientAfter installing, you can use the commands below to stop, start, enable and check PostgreSQL status:
sudo systemctl stop postgresql.service
sudo systemctl start postgresql.service
sudo systemctl enable postgresql.service
sudo systemctl status postgresql.service
Step 3 : Create PostgreSQL Linux User Password
If you want create or change the default PostgreSQL user password then run the commands below to create or change the user password in the bash shell and not in the PostgreSQL interactive shell:
sudo passwd postgresWhen prompted, create a new Linux password for postgres user as show below:
Enter new UNIX password:
Retype new UNIX password:
passwd: password updated successfully
After that, when you will try to access PostgreSQL interactive shell, every time you will be ask to confirm the password that you created above.
Step 4 : Create PostgreSQL database
To create PostgreSQL database, first connect to its shell console by running command below. During connecting, you will be prompted to enter the password you created above.
su - postgres
psql
After connecting to its shell console, run the command below in the shell console to create a new database called askbot as how below:
create database askbot;Next, run the command below to create a database user named askbotuser :
create user askbotuser with password 'your_new_password_here';Grant the newly created database user full access to the database:
grant all privileges on database askbot to askbotuser;
\q
exit
Next, you will need to edit PostgreSQL configuration file and enable md5 authentication. To to that, run the command below:
sudo nano /etc/postgresql/12/main/pg_hba.confAfter open the file, edit the highlighted lines to reference md5 authentication as show below:
"local" is for Unix domain socket connections only
 local   all             all                                     md5
 IPv4 local connections:
 host    all             all             127.0.0.1/32            md5
 IPv6 local connections:
 host    all             all             ::1/128                 md5
 Allow replication connections from localhost, by a user with the
Save the file and exit.
Now, run the command below to restart the PostgreSQL services :
sudo systemctl restart postgresqlStep 5 : Install and Configure Askbot
Before install askbot, you will need to create a new dedicated user account for Askbot installation. So simply create a new user named askbot and create new password for that user account:
sudo useradd -m -s /bin/bash askbot
sudo passwd askbot
Next, add the askbot user to the sudo group by running command below :
sudo usermod -a -G sudo askbotAfter that, run the commands below to install Python virtualenv (virtual environment) package:
sudo pip install virtualenv sixNow, login to the askbot user account using the su commands and create a new virtual environment for Askbot:
su - askbot
virtualenv askbot
Switch to the askbot virtual environment directory and activate the it:
cd askbot
source bin/activate
Next, run the command below to install Askbot, Six, and PostgreSQL modules.
pip install --upgrade pip
pip install six==1.10.0
pip install askbot==0.11.1 psycopg2
After installing modules, create a directory for Askbot :
mkdir myapp
cd myapp
And setup Askbot using the command below:
askbot-setupThe command above will prompt to ask environment details. You can use the below guide to answer:
Deploying Askbot - Django Q&A forum application
Problems installing? -> please email support@askbot.com

To CANCEL - press Ctr-C.

Enter the Root directory path (relative or absolute).
This directory will contain the Django project's manage.py file.
Press ENTER to use ./askbot_site.
>
Enter the Project directory name.
Will be a subdirectory within the Root for the settings.py, urls.py files.
Press ENTER to use askbot_site.
>
Select the database engine: 1 - postgresql, 2 - sqlite, 3 - mysql, 4 - oracle.
Type 1/2/3/4, press ENTER to select sqlite
> 1
Enter the database host name
Press ENTER to use empty string (default value).
>
Enter database name. (required)
> askbot
Enter database password. (required)
> type_password_here
Enter database user name. (required)
> askbotuser
Enter the database port
Press ENTER to use empty string (default value).
>
Enter email of the site admin (required)
> admin@example.com
Enter name of the site admin (required)
> superadmin
Enter the default from email
Press ENTER to use admin@example.com.
>
Enter the server email
Press ENTER to use admin@example.com.
Finally, run the command below to complete the setup:
cd askbot_site/
python manage.py collectstatic
python manage.py migrate
At this point, Askbot is installed on your system and ready to be used.
You can start or test the Askbot application by running the command below:
python manage.py runserver --insecure 0.0.0.0:8080Step 6 : Access Askbot
To access your Askbot application via the URL, open your favorite web browser and browse the server IP with port 8080:
http://localhost:8080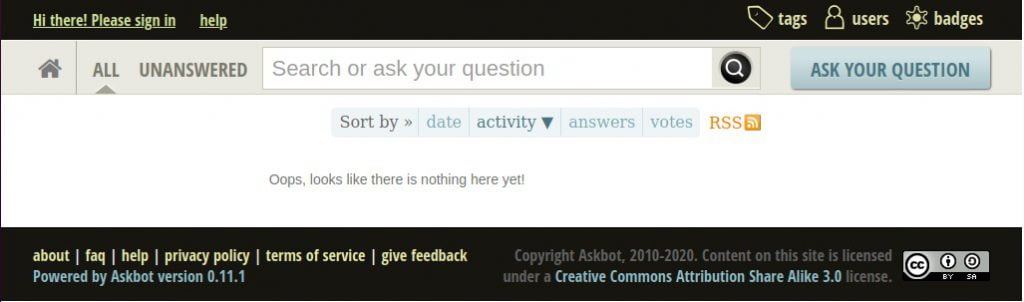
Use the below URL to login as admin:
http://localhost:8080/adminIf you not able to login, run the command below to create a super admin account:
python manage.py createsuperuserThat’s all
If you face any error and issue in above steps , please use comment box below to report.
If our tutorials helped you, please consider buying us a coffee. We appreciate your support!
Thank you for your support.

