In this article, we are going to shows that how to Install Apache Spark on Ubuntu 18.04 | 20.04.
Apache Spark is an open-source framework packaged and a general-purpose cluster computing system for large-scale data and machine learning processing.
It comes with built-in modules and higher-level libraries, including support for SQL queries( Spark SQL), streaming data(Spark Streaming), machine learning(MLlib) and graph processing(GraphX).
Apache Spark is able to analyzing a large scale of data and distribute it across the cluster and process the data in parallel and it is also supports a wide range of programming languages that includes Java, Scala, Python, and R.
Install Apache Spark on Ubuntu
Simply follow below steps to installing Apache Spark Go on Ubuntu 18.04 | 20.04:
Step 1 : Install Java JDK
To install the latest version of Java, run the commands below:
sudo apt update
sudo apt install default-jdk
To check the version of java, run the commands below:
java --version
When you run the commands above, it will show the some lines as below:
openjdk 11.0.10 2021-01-19
OpenJDK Runtime Environment (build 11.0.10+9-Ubuntu-0ubuntu1.20.04)
OpenJDK 64-Bit Server VM (build 11.0.10+9-Ubuntu-0ubuntu1.20.04, mixed mode, sharing)
Step 2 : Install Scala
Scala is required to run Apache Spark bacause Apache Spark is developed using the Scala.
To install Scala run the command below:
sudo apt install scala
Run the below command to check the version of Scala:
scala -version
The above command will show some lines as below:
Scala code runner version 2.11.12 -- Copyright 2002-2017, LAMP/EPFL
Step 3 : Install Apache Spark
At this point, all required packages is installed in your Ubuntu system, now run the commands below to download the latest version of Apache Spark:
cd /tmp
wget https://archive.apache.org/dist/spark/spark-2.4.6/spark-2.4.6-bin-hadoop2.7.tgz
Now extract the downloaded file and move it to the /opt directory by running command below:
tar -xvzf spark-2.4.6-bin-hadoop2.7.tgz
sudo mv spark-2.4.6-bin-hadoop2.7 /opt/spark
Next, you will to create and configure Spark environment variables to easily execute and run Spark commands. You can do that by editing .bashrc file:
nano ~/.bashrc
And add the below lines at the end of the file:
export SPARK_HOME=/opt/spark
export PATH=$PATH:$SPARK_HOME/bin:$SPARK_HOME/sbin
Save and close the file. Now run the command below to apply changes and activate the environment:
source ~/.bashrc
Step 4 : Start Apache Spark
To start Apache Spark master server, run the commands below:
start-master.shNext, run the commands below to start Spark work process :
start-slave.sh spark://localhost:7077
Replace localhost with the server hostname or IP address as below:
start-slave.sh spark://your-server-ip:7077
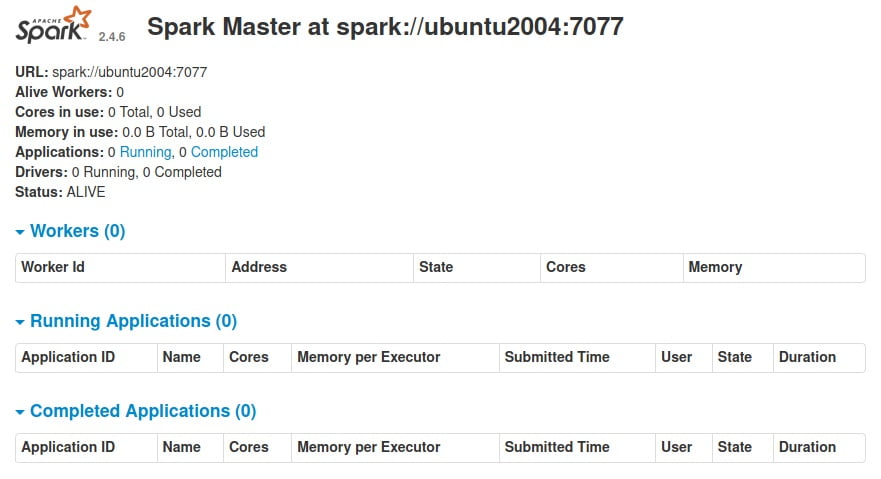
After the Spark work process start, open your favorite browser and browse to the server hostname or IP address as show below:
http://localhost:8080
Again, replace localhost with the server hostname or IP address.
The above command will open the Spark dashboard:

Step 5 : Spark Shell
You can also connect to Spark server using its command shell. To do that, run the command below:
spark-shell
It will launch the Spark shell.
Spark session available as 'spark'.
Welcome to
      ____              __
     / __/__  ___ _____/ /__
    _\ \/ _ \/ _ `/ __/  '_/
   /___/ .__/\_,_/_/ /_/\_\   version 2.4.6
      /_/

Using Scala version 2.11.12 (OpenJDK 64-Bit Server VM, Java 11.0.10)
Type in expressions to have them evaluated.
Type :help for more information.

scala>
That’s all
If you face any error and issue in above steps , please use comment box below to report.


