
In this post, we are going to show that how to Install aaPanel on Ubuntu 18.04 | 20.04. If your are going to Install aaPanel on your Ubuntu then this post is ideal for you.
aaPanel is free, open-source, simple and powerful server control panel that is used to manage your web servers in a web hosting environment. With the help of aaPanel, you can manage and control hosting services such as domains, SSL Certificate, MySQL databases, websites and many other web hosting features through a interactive web-base GUI(Graphical User Interface).
For more details about aaPanel, please visit its official website.
Ubuntu is a Linux Operating System based on Debian and mostly composed of non-profit(free) and open-source software. It is a complete Linux operating system that compatible with desktops, laptops, server and other devices. Ubuntu is Open Source so it is freely available for both community and professional support.
if you are a learner and looking for a Linux distribution for Learning then Ubuntu Linux Operating System is best for you as a beginning.
How to Install aaPanel on Ubuntu
Simply follow below steps to install aaPanel on your Ubuntu:
Step 1 : Configure Local Host
First of all, you will need to setup local domain on the server. Run the commands below to open the Ubuntu local hosts file:
sudo nano /etc/hostsNow, update the below line in the server address:
127.0.0.1 aapanel.example.comAfter updating, it will looks similar like below:
127.0.0.1              localhost
127.0.0.1              aapanel.example.com

# The following lines are desirable for IPv6 capable hosts
::1     ip6-localhost ip6-loopback
fe00::0 ip6-localnet
ff00::0 ip6-mcastprefix
ff02::1 ip6-allnodes
ff02::2 ip6-allrouters
Save the hosts file and exit.
Step 2 : Install aaPanel
To install aaPanel on your Ubuntu system, first add its repository to Ubuntu using command below:
wget -O install.sh http://www.aapanel.com/script/install-ubuntu_6.0_en.sh && sudo bash install.shThe command above will download all packages and install them. After installation, it will display a successful message similar like below:
==================================================================
 Congratulations! Installed successfully!
 aaPanel Internal Address: http://10.0.52.20:8888/5c802drf
 username: 4zsfeq6v
 password: wsqf4463
 Warning:
 If you cannot access the panel,
 release the following port (8888|888|80|443|20|21) in the security group
 Time consumed: 16 Minute!
Step : 3 Access aaPanel Web Interface
At this stage, aaPanel is installed and ready to use. To launch it, open your favorite web browser and browse to http://localhost:8888/8c507cff
http://localhost:8888/5c802drfReplace the example IP address or localhost with your server’s address.
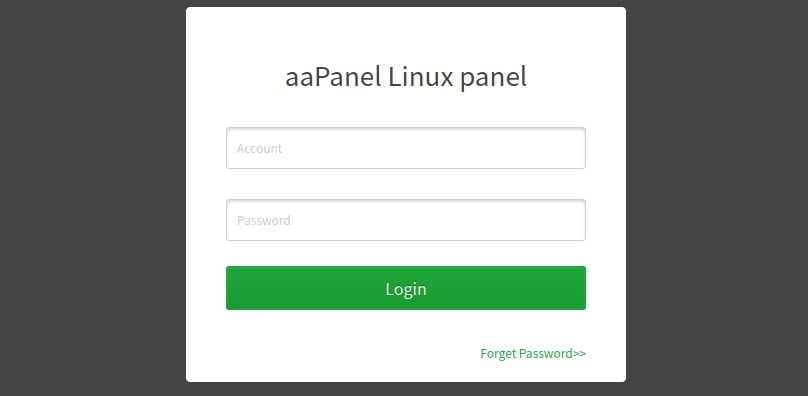
Login with the username and password provided above.
That’s all
If you face any error and issue in above steps , please use comment box below to report.
If our tutorials helped you, please consider buying us a coffee. We appreciate your support!
Thank you for your support.

