In this article, we are going to shows how to Enable | Turn On Microsoft Remote Desktop Connection in Windows 11. If you want to enable Remote Desktop Connection in Windows 11 then this article is ideal for you.
Microsoft Windows comes with a Remote Desktop Connection tool that allow you to remotely connect to another system from anywhere. By default, it is disabled in new Windows 11.
When you enable it on your Windows system and allow remote connections to your PC, you can use another device to connect to your PC and can access to all of your applications, files and network resources and many more from anywhere.
Microsoft Windows has officially released the first build of Windows 11 for developers and enthusiasts to get their feedback on the new features and UI design changes. If your system meets the all requirements to get Windows 11 Insider Preview then you can join the Windows Insider program.
Windows 11 is a major release of the Windows NT operating system developed by Microsoft. it is the successor to Windows 10 and it’s expected to be released later this year.
Enable Remote Desktop Connection in Windows 11
Simply follow below steps to get started with enable Microsoft Remote Desktop in Windows 11 :
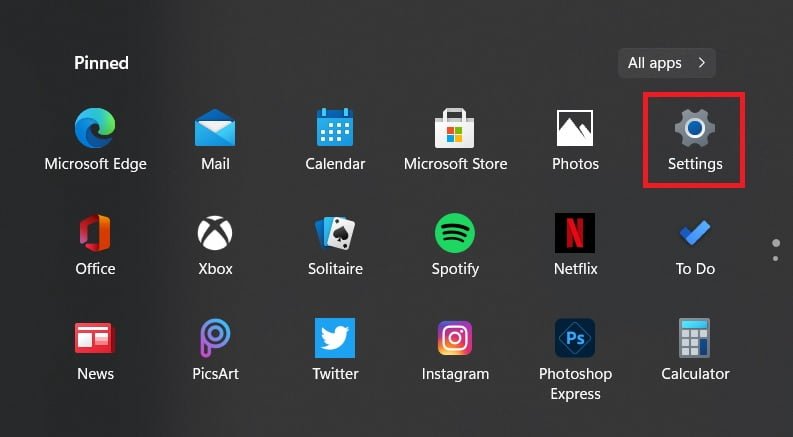
To enable Remote Desktop in Windows 11, Click on the Start button and select Settings as shown in image below:

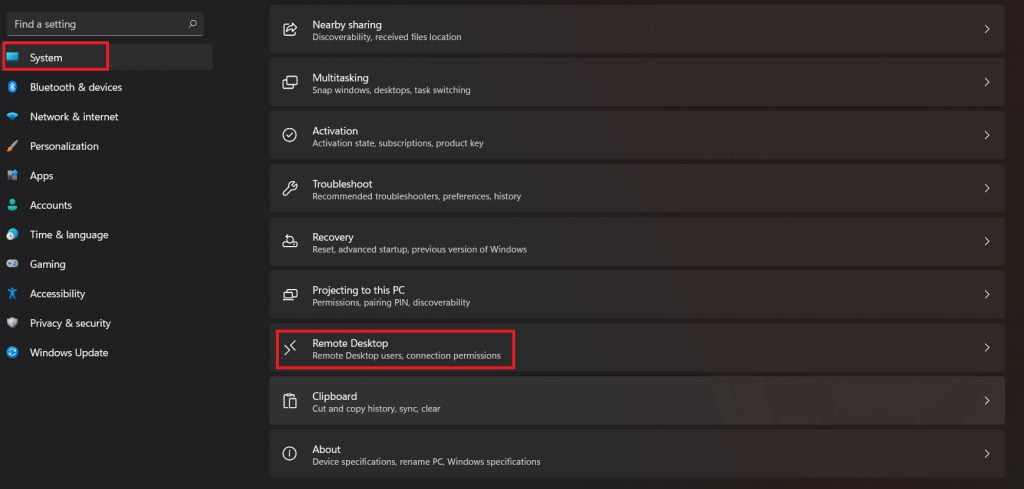
Next, scroll down and select Remote Desktop option from the Settings page :

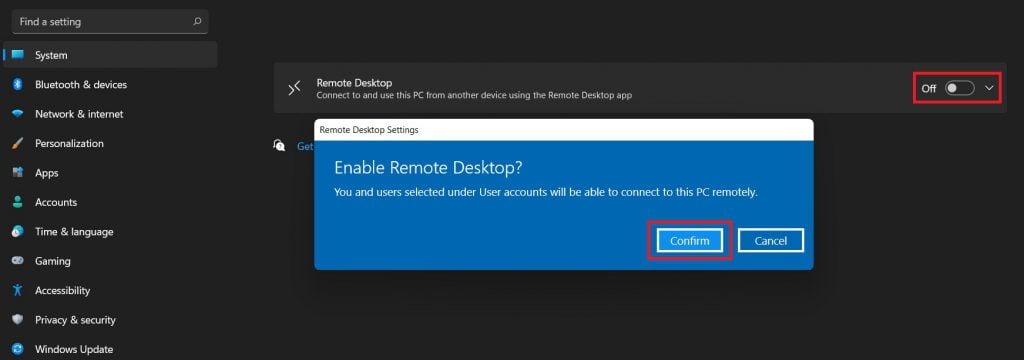
On the Remote Desktop screen, turn on Remote Desktop and confirm it as shown in image below:

After enable it, you are able to connect the PC from another device by the help of Remote Desktop app (available for Windows, iOS, macOS and Android).
That’s all
If you face any error and issue in above steps , please use comment box below to report.
If our tutorials helped you, please consider buying us a coffee. We appreciate your support!
Thank you for your support.


