This brief guide shows how to enable auto HDR (High Dynamic Range ) feature in Windows 11. If you are a beginner or a new user and want to turn on auto HDR feature in your Windows 11 system then this short tutorial is useful and handy for you.
The latest Widows 11 comes with many new feature and HDR is one of them. With this feature, you’ll experience more richer and vibrant color palette graphics for HDR games, videos and applications, only if your device or system supports it.
The best thing is HDR feature is very easy to enable or disable in Windows 11, and in this short guide we will show you how to do that without any error and issue.
When you are ready, follow the steps below to enable auto HDR (High Dynamic Range ) feature in Windows 11 system.
How to Turn on Auto HDR in Windows 11
As we know, HDR feature is very easy and straightforward to enable or turn on in Windows 11. Just go to Windows System’s settings for enable it.
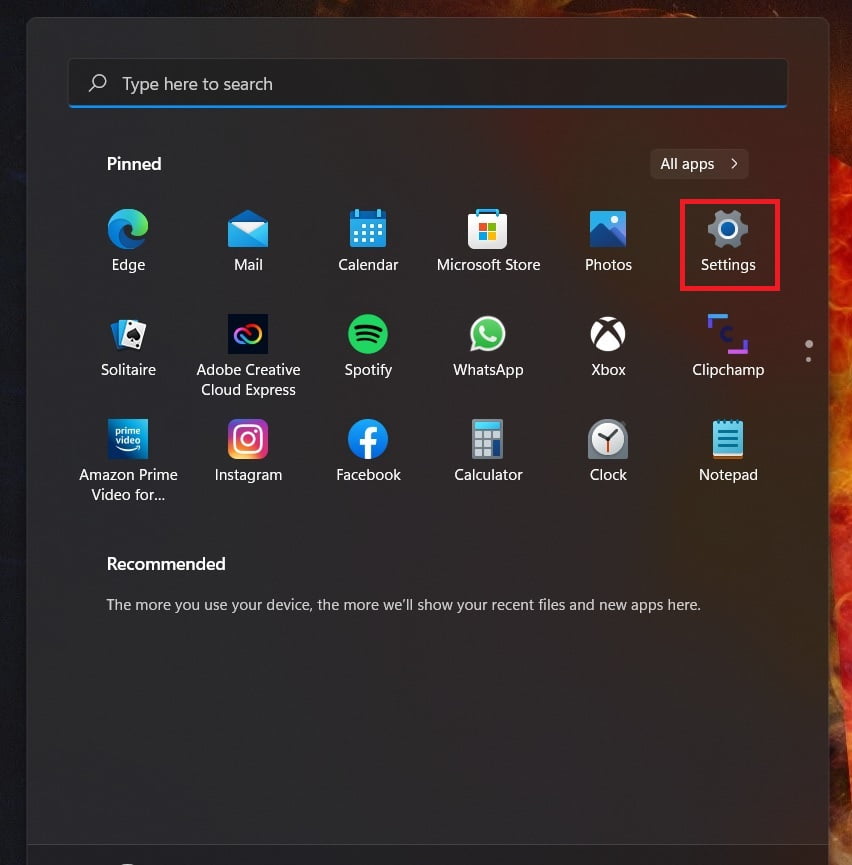
To open windows System Settings, use the Windows key + i shortcut or you can click on Start and choose Settings option as shown in the image below:

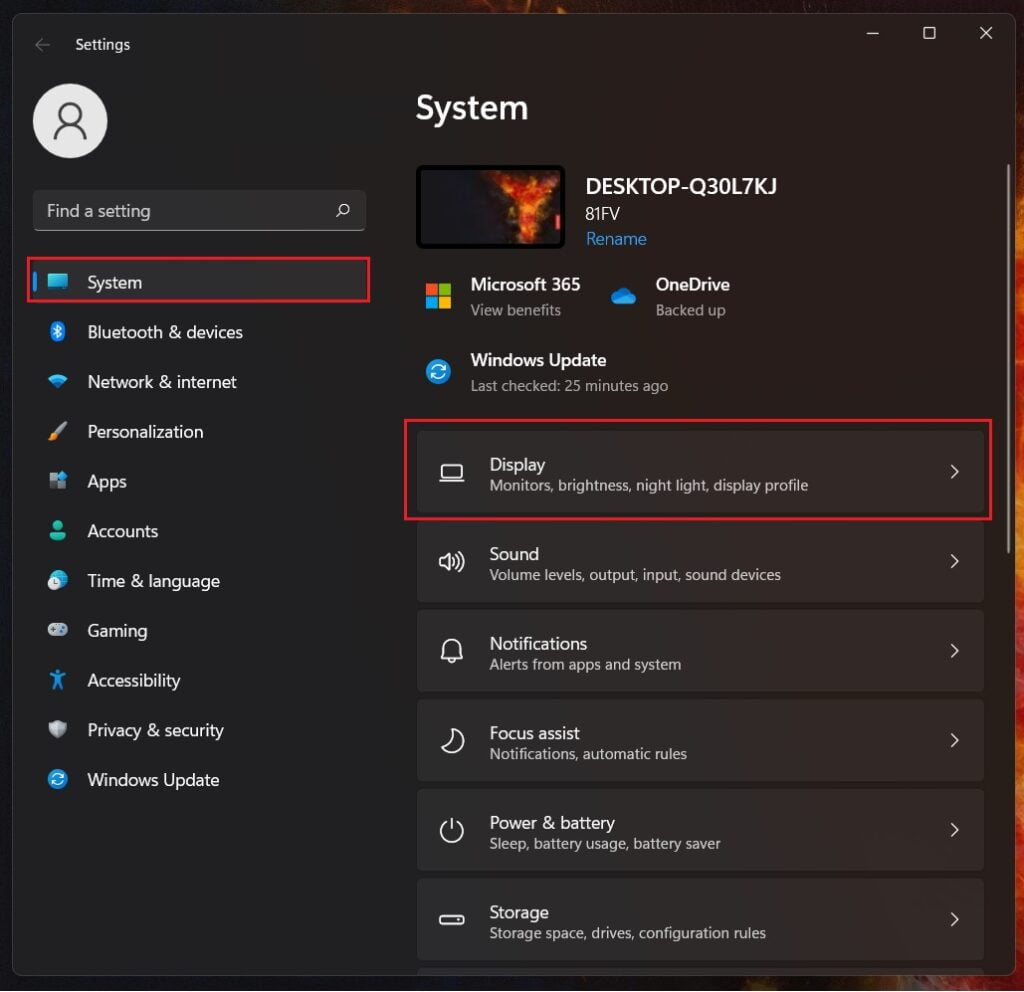
In Windows Settings pane, click on System then select Display option on the right pane of your Windows screen as shown in the image below:

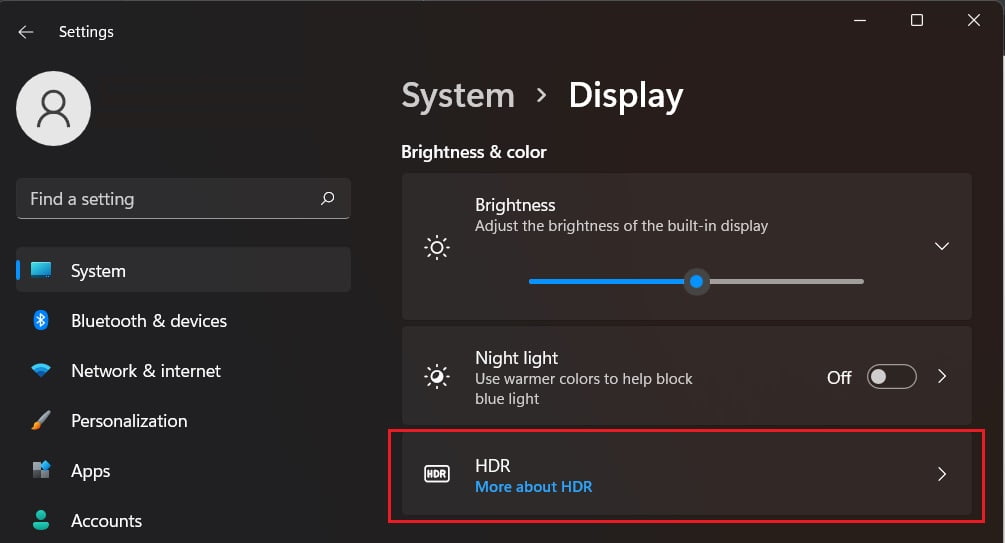
On the Display settings pane, select HDR or Use HDR option as shown below:

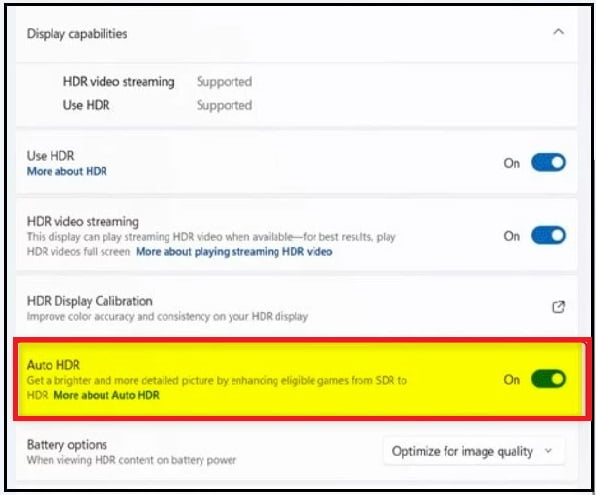
On the HDR settings pane, look for Auto HDR settings and turn on it as shown in the image below:

How to Disable or Turn Off Auto HDR in Windows 11
To disable or turn off Auto HDR feature in your Windows 11 system, just reverse the steps above.
Start -> Settings -> System -> Display -> HDR and just turn off Auto HDR setting.
That’s all
If you find any error and issue in above steps , please use comment box below to report.
If our tutorials helped you, please consider buying us a coffee. We appreciate your support!
Thank you for your support.


