This article shows how to edit hosts File in Windows 11. If you want to edit or modify local hosts file in your Windows 11 system then this article is useful for you.
In the Windows, a hosts file is a plain text file that is used to map servers or hostnames to IP addresses on your local system. Mostly Windows have both hosts file and DNS (Domain Name System) and now DNS is primarily used for IP resolution. But if there are same records in both the hosts file and DNS then hosts file has priority over DNS.
Microsoft Windows has officially released the first build of Windows 11 for developers and enthusiasts to get their feedback on the new features and UI design changes. If your system meets the all requirements to get Windows 11 Insider Preview then you can join the Windows Insider program.
Windows 11 is a major release of the Windows NT operating system developed by Microsoft. It is the successor to Windows 10 and it’s expected to be released later this year.
How to Edit Windows 11 Hosts File
To edit or modify local hosts file in your Windows 11 system, follow steps below:
Find Hosts File in Windows 11
To find the hosts file Windows hosts file, use the path below:
c:\Windows\System32\Drivers\etc\hosts
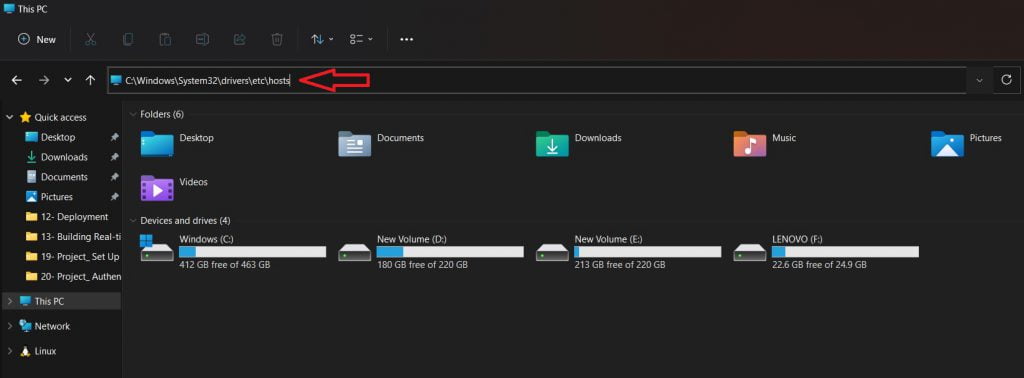
Open the hosts file with notepad to view it:
# Copyright (c) 1993-2009 Microsoft Corp.
#
# This is a sample HOSTS file used by Microsoft TCP/IP for Windows.
#
# This file contains the mappings of IP addresses to host names. Each
# entry should be kept on an individual line. The IP address should
# be placed in the first column followed by the corresponding host name.
# The IP address and the host name should be separated by at least one
# space.
#
# Additionally, comments (such as these) may be inserted on individual
# lines or following the machine name denoted by a '#' symbol.
#
# For example:
#
#      102.54.94.97     rhino.acme.com          # source server
#       38.25.63.10     x.acme.com              # x client host

# localhost name resolution is handled within DNS itself.
#	127.0.0.1       localhost
#	::1             localhost
Edit or Add New Host Records
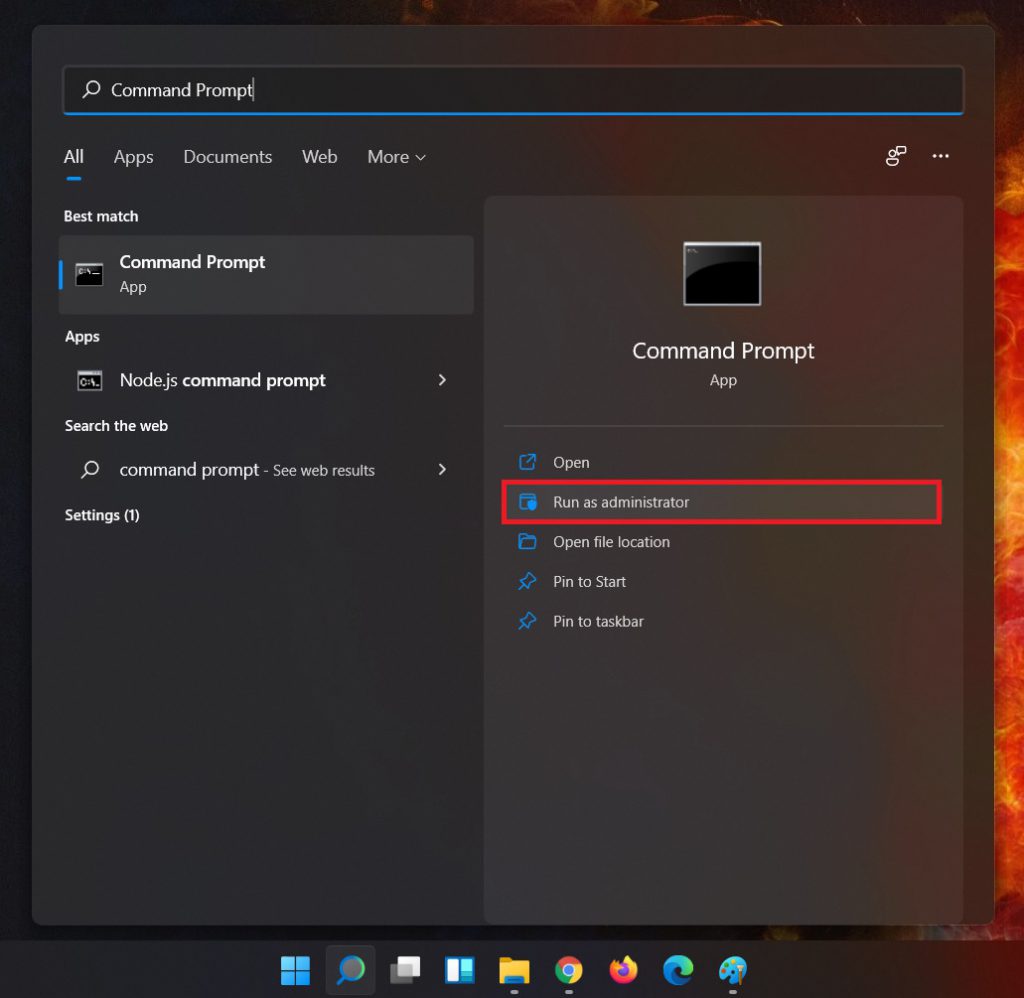
Only administrator can edit or modify the host file in windows system, so search for Command Prompt in windows search bar and open it as administrator as shown below:
After open the Command Prompt, type the commands below and press Enter to run it:
notepad.exe c:\Windows\System32\Drivers\etc\hosts
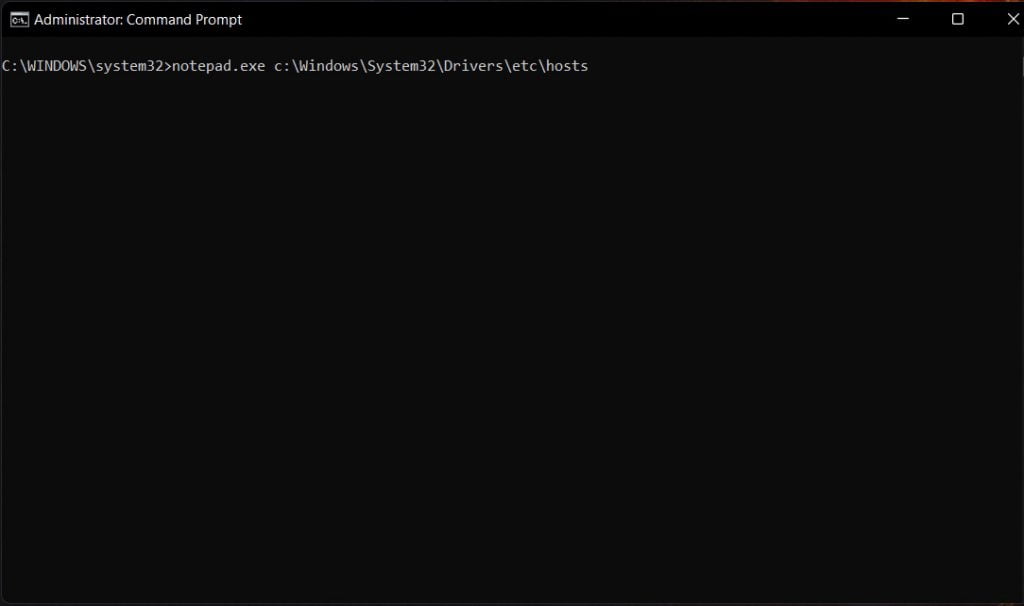
The command above will open the host file in Notepad as administrator. Now, you can edit it easily in notepad.
Next, if you want to add a new entry in hosts file, scroll down to the end of the file and add your new entries there. For an example, if you want to map 127.0.0.1 to example.com, add this entry end of the file as shown in image below:
# Copyright (c) 1993-2009 Microsoft Corp.
#
# This is a sample HOSTS file used by Microsoft TCP/IP for Windows.
#
# This file contains the mappings of IP addresses to host names. Each
# entry should be kept on an individual line. The IP address should
# be placed in the first column followed by the corresponding host name.
# The IP address and the host name should be separated by at least one
# space.
#
# Additionally, comments (such as these) may be inserted on individual
# lines or following the machine name denoted by a '#' symbol.
#
# For example:
#
#      102.54.94.97     rhino.acme.com          # source server
#       38.25.63.10     x.acme.com              # x client host

# localhost name resolution is handled within DNS itself.
#	127.0.0.1       localhost
#	::1             localhost
127.0.0.1               example.com
After that, click on the File and then Save from the top menu at left side of the windows screen as shown in image below:
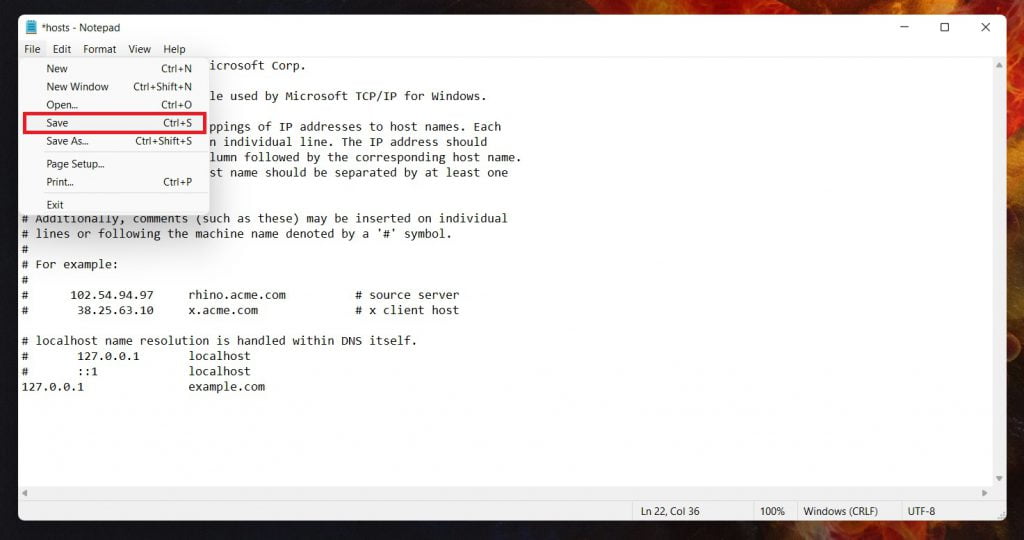
After save the file, the new entry add immediately.
That’s all
If you face any error and issue in above steps , please use comment box below to report.
If our tutorials helped you, please consider buying us a coffee. We appreciate your support!
Thank you for your support.

