This article shows how to Change your Computer (PC) Name in Windows 11. If you want to change or rename your Computer (PC) Name in Windows 11 system then this article is useful for you.
Microsoft Windows has officially released the first build of Windows 11 for developers and enthusiasts to get their feedback on the new features and UI design changes. If your system meets the all requirements to get Windows 11 Insider Preview then you can join the Windows Insider program.
Windows 11 is a major release of the Windows NT operating system developed by Microsoft Windows. It is the successor to Windows 10 and it’s expected to be released later this year.
If you want to change the default computer name of your newly bought Windows system then you can follow the steps below.
How to Change Computer Name in Windows 11
There are many methods to change or rename computer name in Windows system. in this article, we are going to show some methods to change the computer name.
Method 1 : Rename computer from System Settings
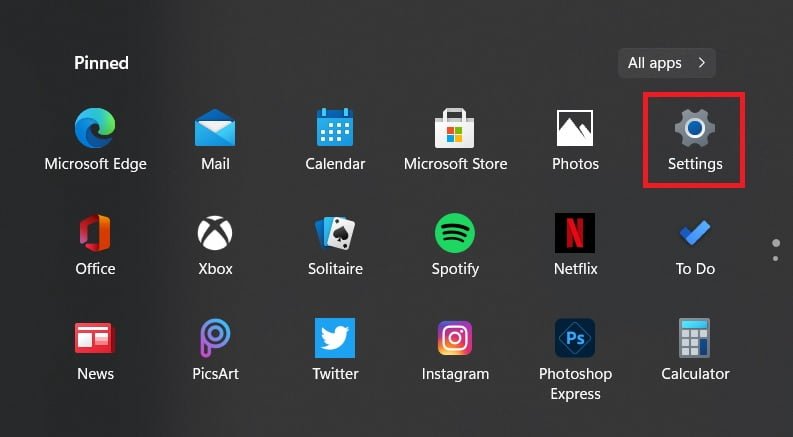
To rename the computer name from System Settings , click on the start menu and open the system Settings as shown in the image below:
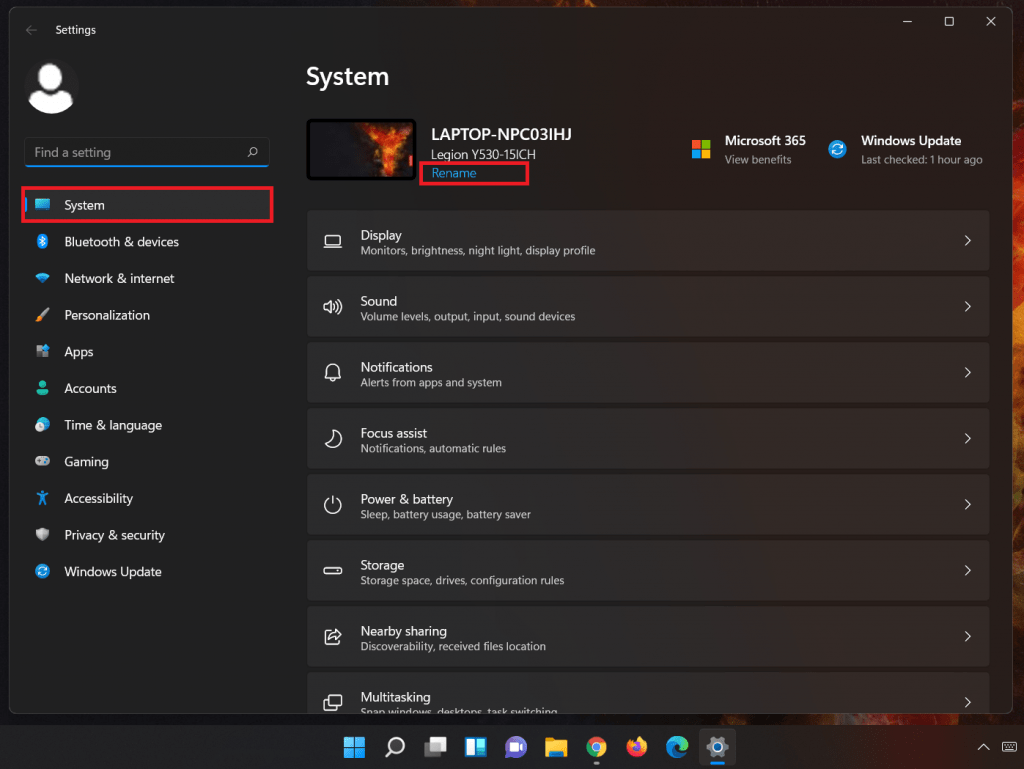
After that, click on the Rename as shown below:
Next, type a name that you want to use for the your Windows computer as shown in the image below:
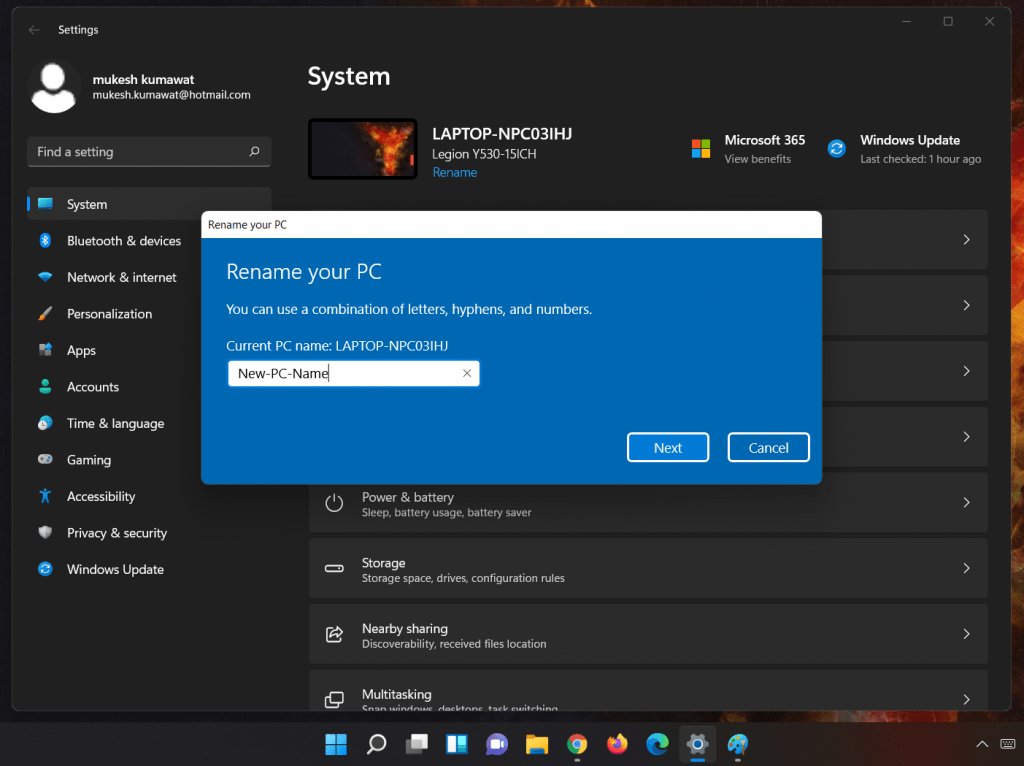
After set the name, click on the Next button and restart your system to apply the change.
Method 2 : Change PC Name from System Properties
You can also change or rename Windows computer name using System Properties. Use Windows key + R to launch the Run dialog box and type the command below:
sysdm.cpl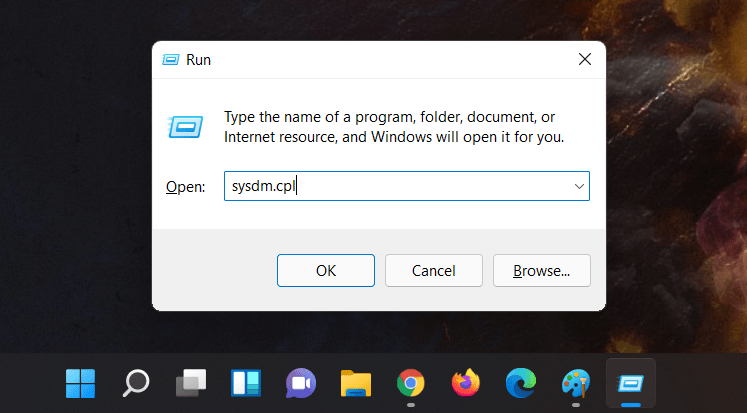
When you hit the Enter key, the System Properties dialog box will open as shown in the image below:
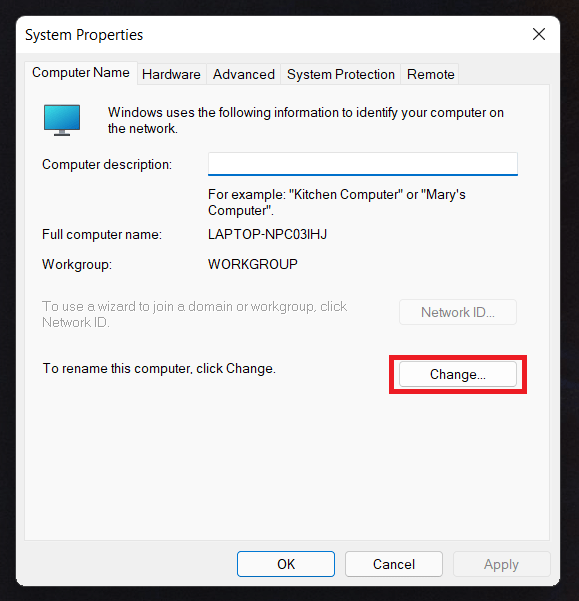
To change your computer name, click the Change button as shown in the image above.
When you click, a another dialog box open. Type a name that you want to use for the your Windows computer as shown in the image below:
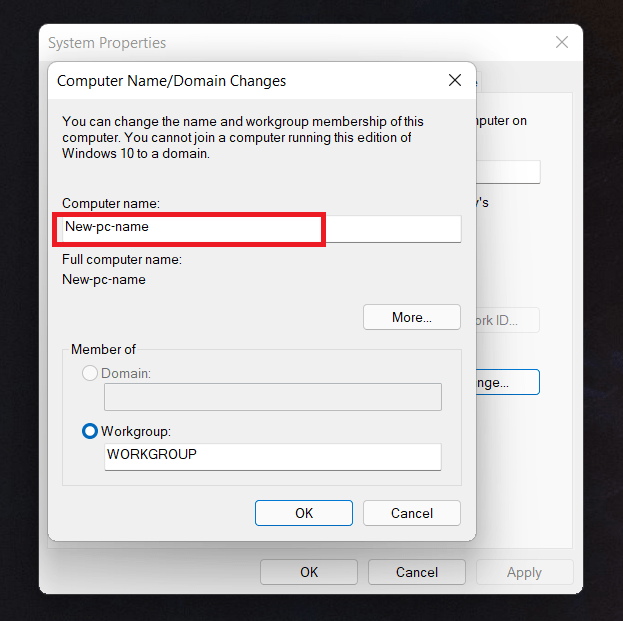
After set the name, click on the OK button and restart your system to apply the change.
Method 3 : Change Computer Name from Command Prompt
To change Computer Name from Command Prompt, simply search for Command Prompt in Windows search bar and open it as administrator as shown below:
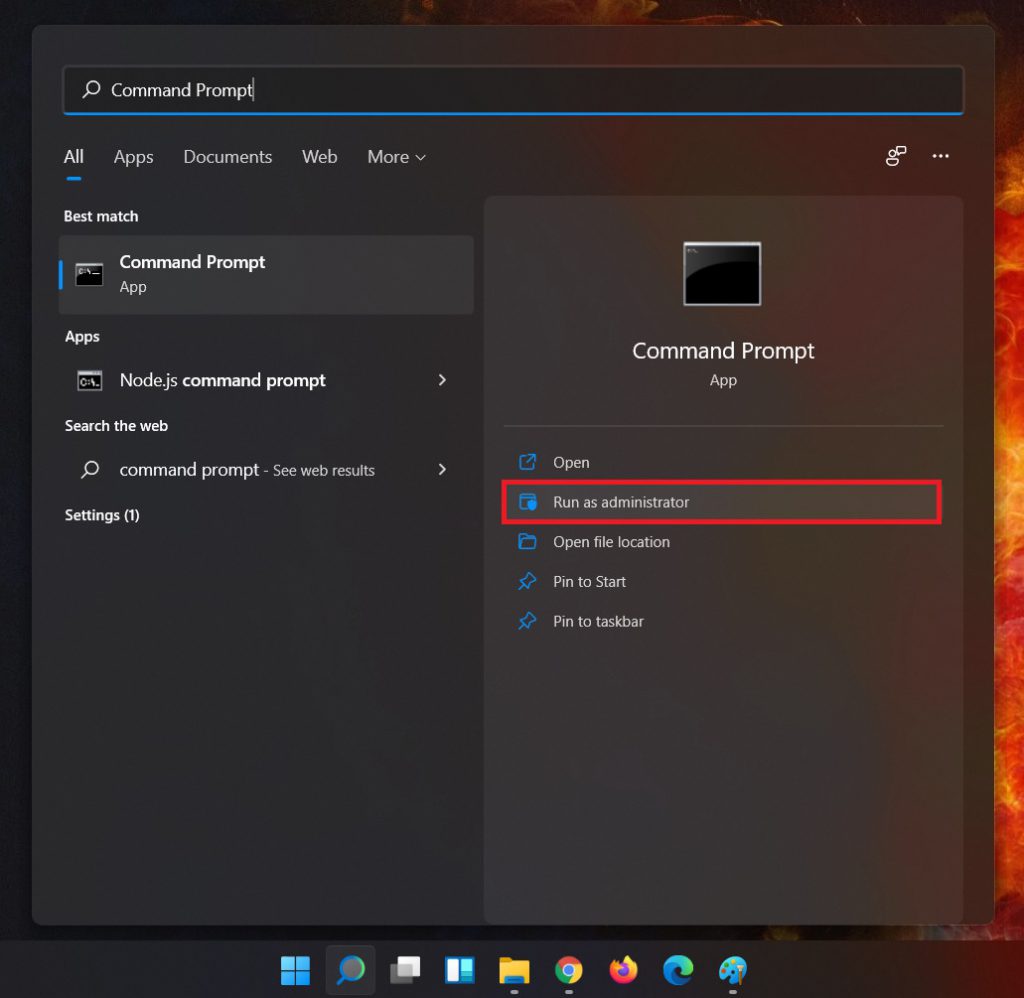
After open the Command Prompt, type the commands below on the Command Prompt console and press Enter to run it:
wmic computersystem where name="Old_PC_Name" call rename name="New_PC_Name"Replace Old_PC_Name with the current computer name and replace New_PC_Name with the new name that you want to use for the your Windows computer.
After run the command above, restart your system to apply the change.
Method 4 : Rename or Change Computer (PC) Name using PowerShell
To rename or change computer (PC) name using PowerShell , search for PowerShell in Windows search bar and open it as administrator as shown below:
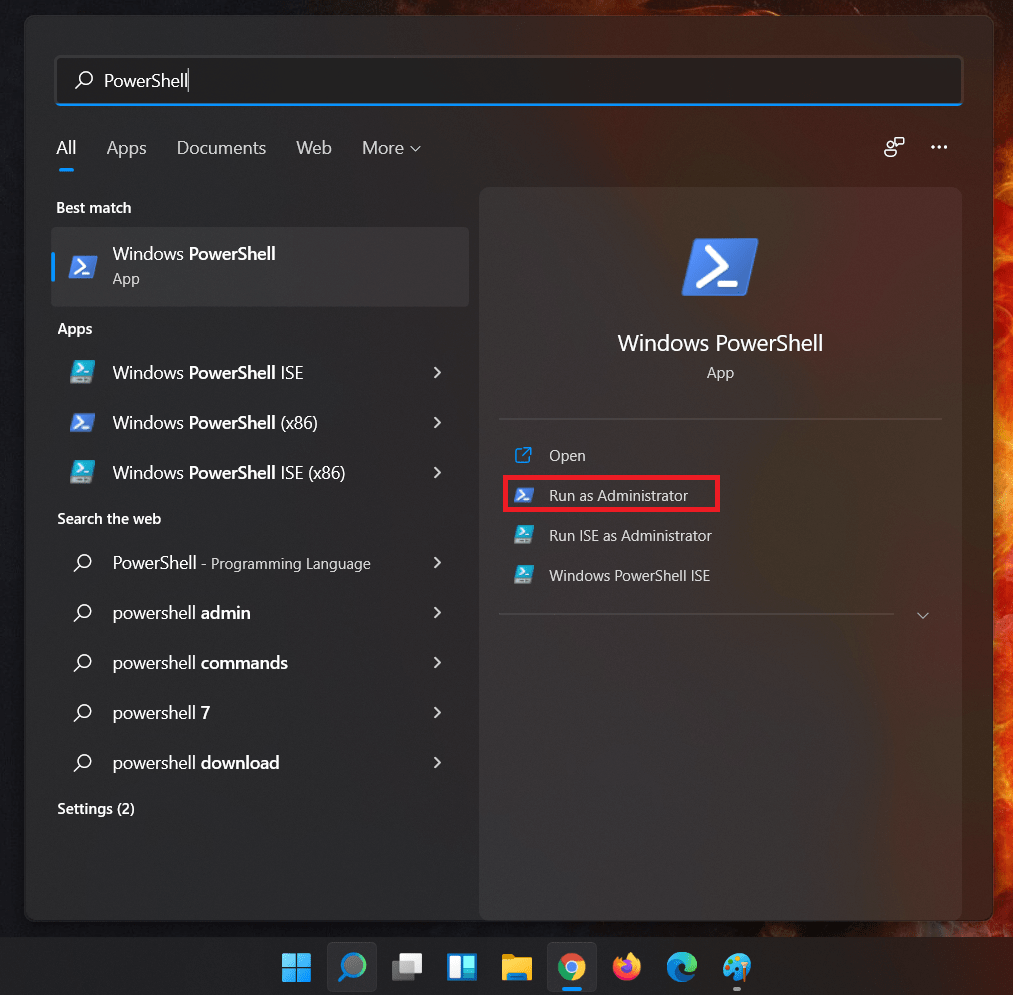
After open the Windows PowerShell, type the commands below and press Enter to run the command:
Rename-Computer -NewName "NEW_PC_NAME"Replace NEW_PC_NAME with the new name that you want to use for the your Windows computer. After that, restart your system to apply the change.
That’s all.
If you face any error and issue in above steps , please use comment box below to report.
If our tutorials helped you, please consider buying us a coffee. We appreciate your support!
Thank you for your support.

