In this article, we are going to shows how to automatically delete trash and temp files on Windows 11. If you want to automatically clear out the trash and temp files on your Windows 11 system then this article is best for you.
Deleting unwanted temporary files and trash from your Windows system improve its performance and free up more space on your system hard drive.
Windows allows you to configure your system to automatically delete the trash (recycle bin files) and temporary files including Internet files. These temporary files are created or downloaded by running applications in the background and if you don’t removed regularly these files from your system, they will create problems and slow down your system.
Microsoft Windows has officially released the first build of Windows 11 for developers and enthusiasts to get their feedback on the new features and UI design changes. If your system meets the all requirements to get Windows 11 Insider Preview then you can join the Windows Insider program.
Windows 11 is a major release of the Windows NT operating system developed by Microsoft. It is the successor to Windows 10 and it’s expected to be released later this year.
Auto Delete Trash and Temp files on Windows 11
Simply follow the steps below to automatically clear out the recycle bin and clear temporary files:
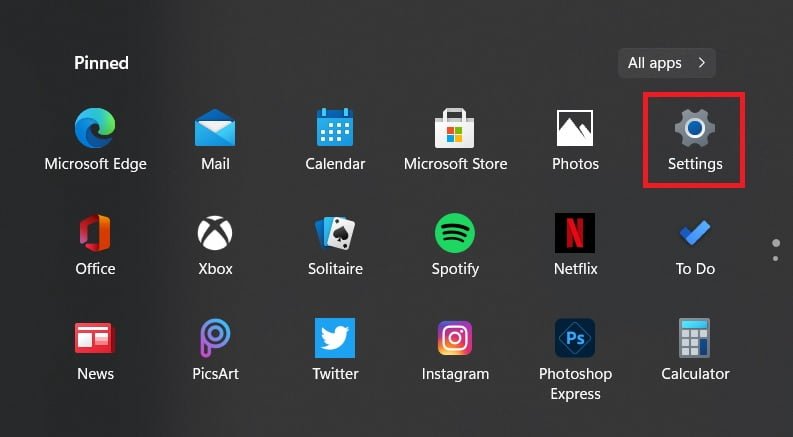
First of all, click on the Start button and select Settings gear icon as shown in image below:
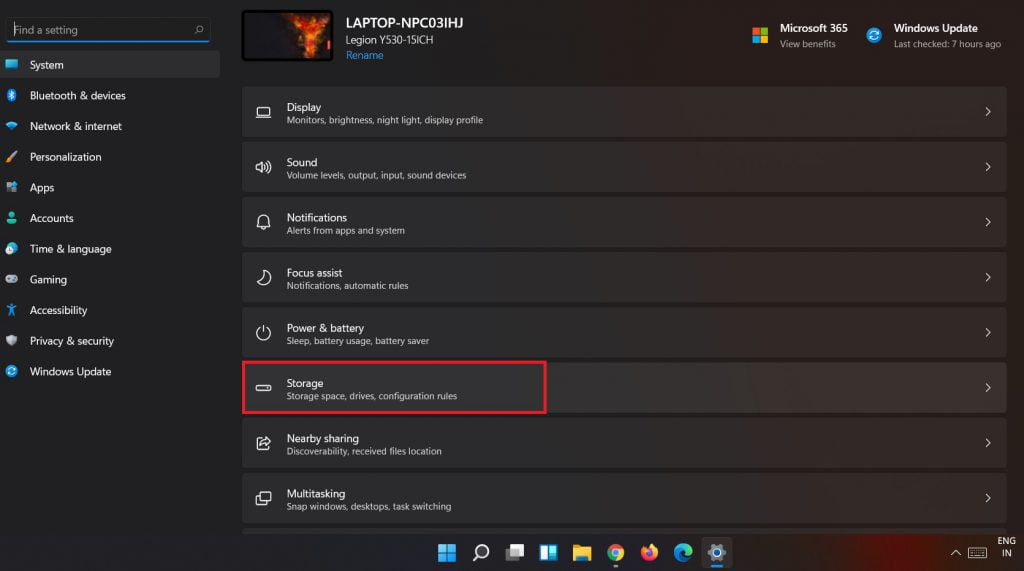
On the setting screen, click on Storage option as shown in image below:
Under the Storage option, turn on Storage sense. After turn on, it will automatically free up space by deleting temporary files and recycle bin data as shown below:
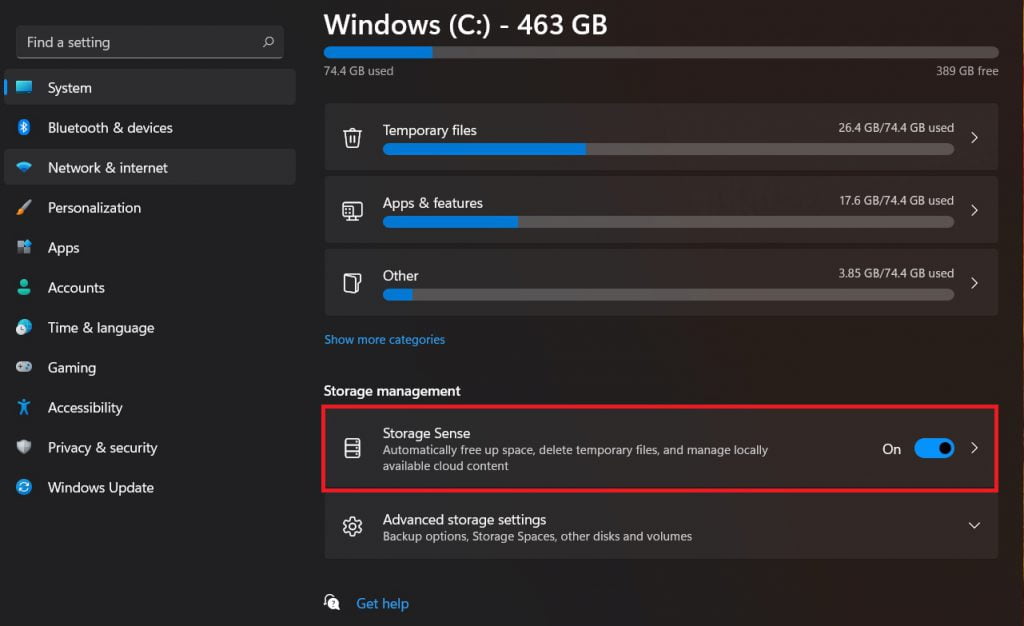
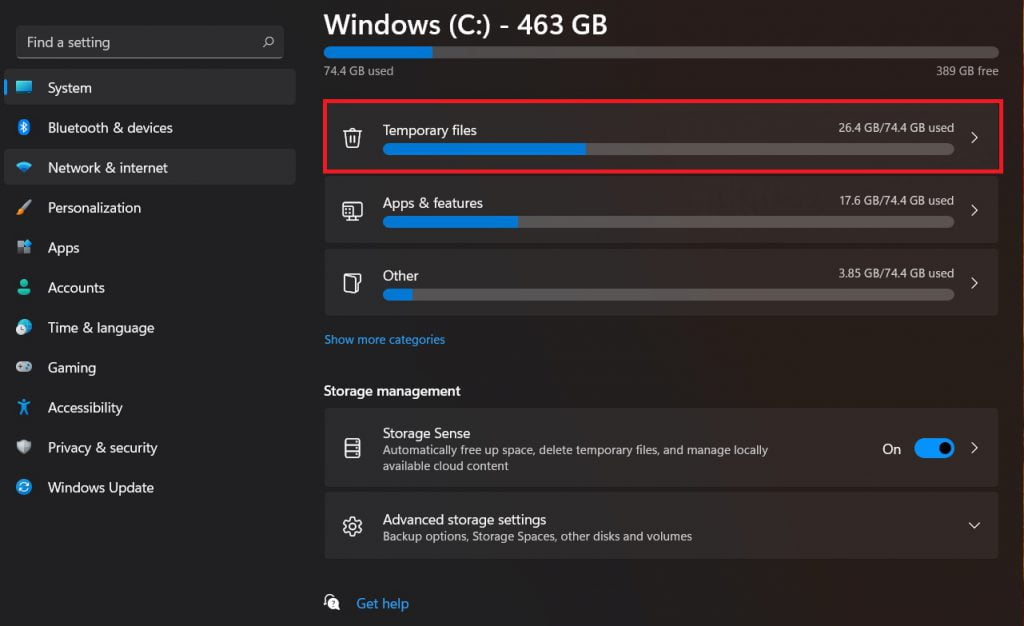
If you want to immediately delete all temporary files and recycle bin data, click on Temporary files:
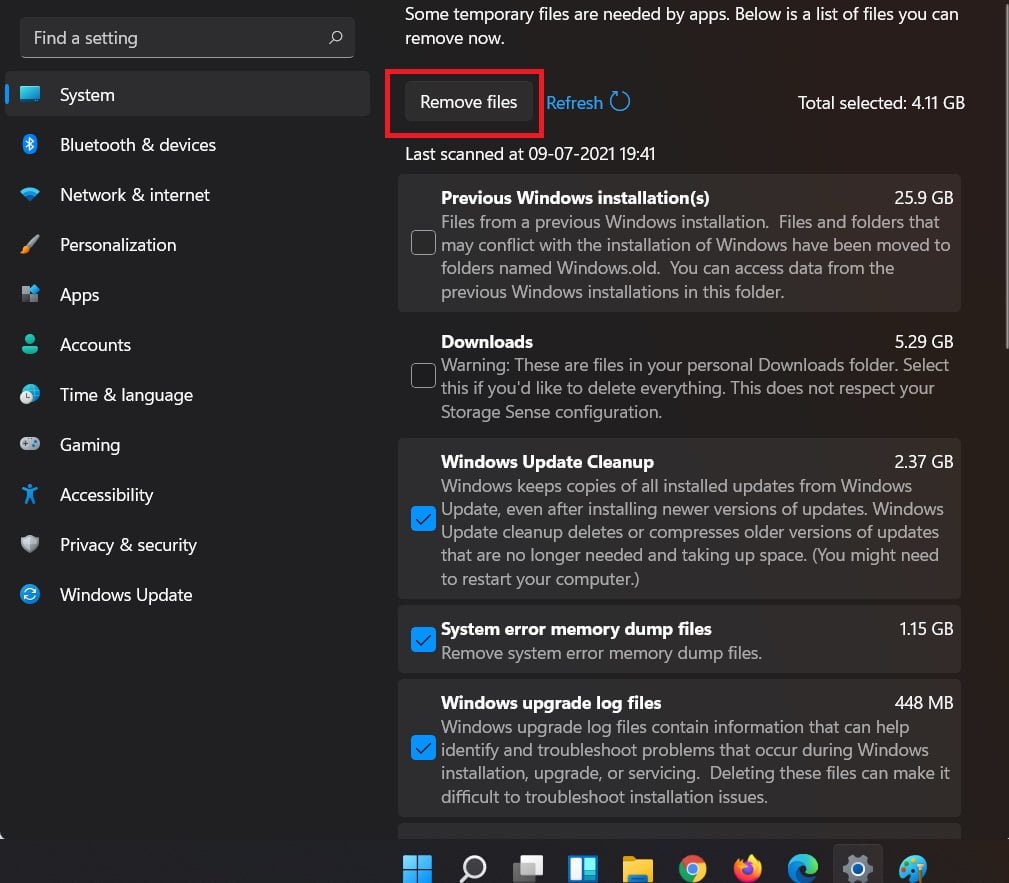
Then click on Remove files as shown image below:
That’s all
If you face any error and issue in above steps , please use comment box below to report.
If our tutorials helped you, please consider buying us a coffee. We appreciate your support!
Thank you for your support.

