In this tutorial, you will learn how to add or remove Ubuntu Linux folder on file explorer navigation pane in Windows 11.
By activating Windows Subsystem for Linux and setting up Ubuntu, the Ubuntu directory or folder is added to the File Explorer’s navigation pane automatically, providing easy access.
Deleting the Ubuntu Linux folder from its location won’t remove it from your system’s drive. If you can no longer find the folder on File Explorer’s navigation pane, then you can take these steps to put it back in its rightful place.
As Previously discussed, By activating Windows Subsystem for Linux and setting up Ubuntu, the Ubuntu directory or folder is added to the File Explorer’s navigation pane automatically, providing easy access.
In the image below, the Ubuntu Linux folder can be seen in the File Explorer’s navigation pane:
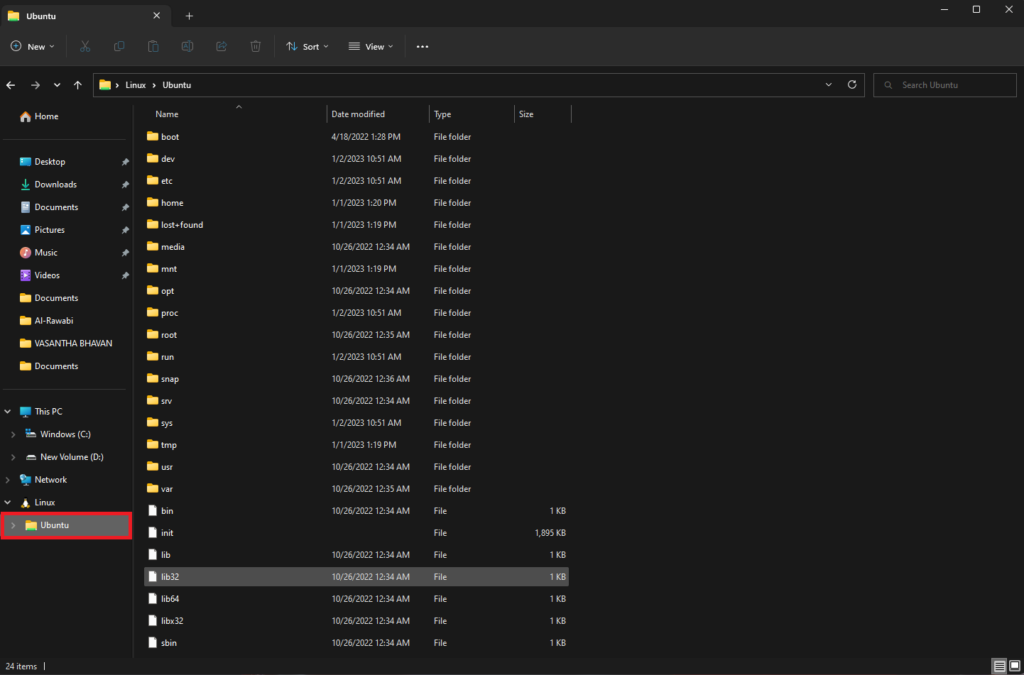
To hide or show the folder in Windows 11, follow the steps below:
Step 1: Open the Windows Registry
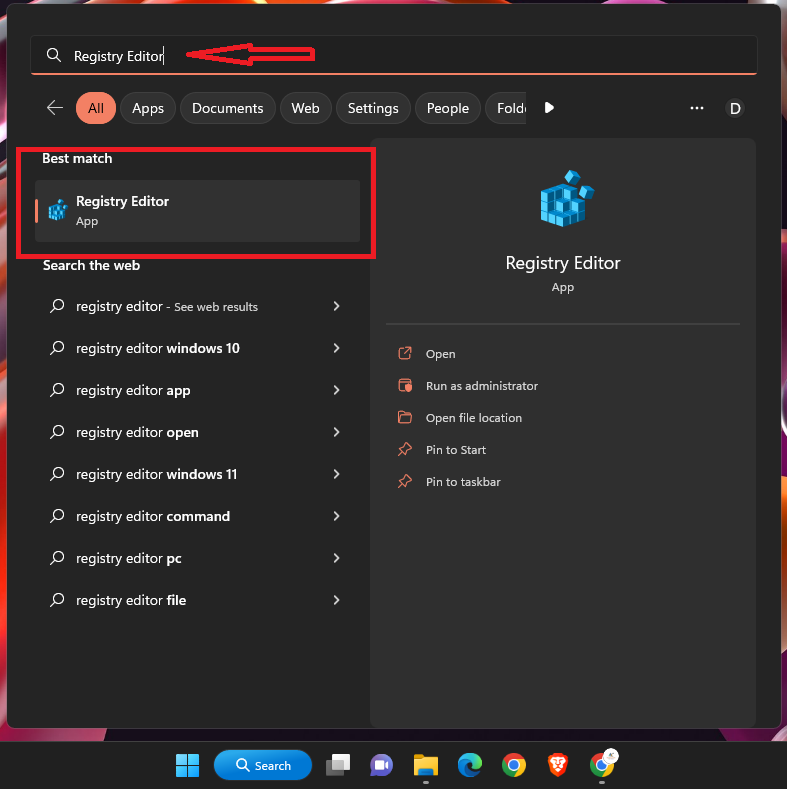
In order to access the Windows registry, start by opening your Start menu and search for Registry Editor. You should see it listed under Best match, so select the Registry Editor app as shown in the image below:
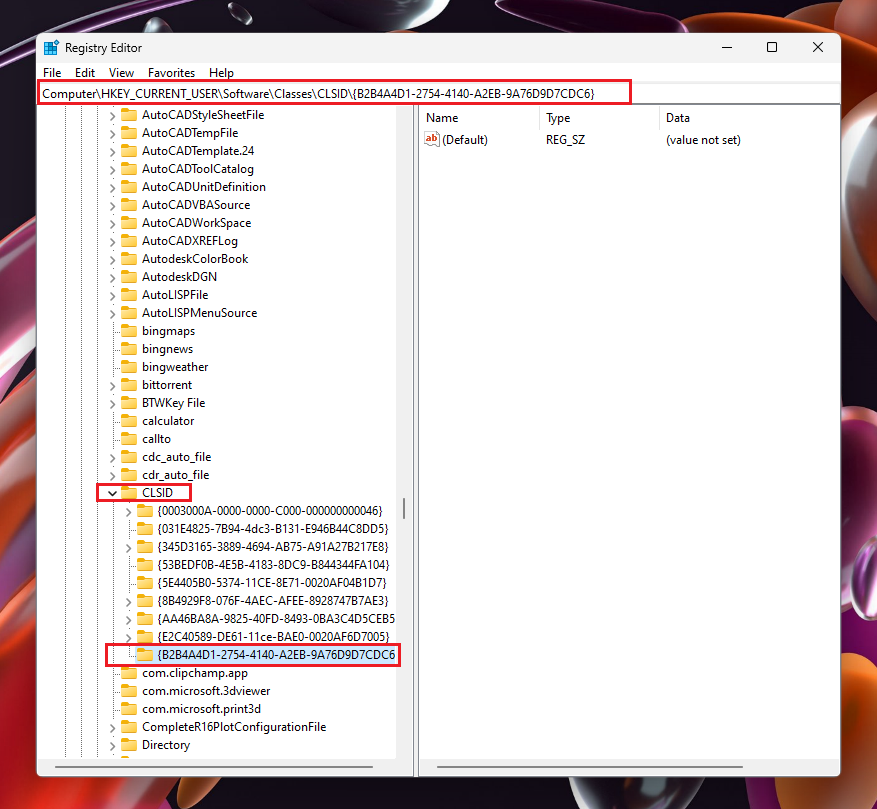
Next, navigate to the folder key path as listed below:
HKEY_CURRENT_USER\Software\Classes\CLSID\{B2B4A4D1-2754-4140-A2EB-9A76D9D7CDC6}
If the {B2B4A4D1-2754-4140-A2EB-9A76D9D7CDC6} folder key is not visible, you can create it by right-clicking on the CLSID key and creating a subkey labeled {B2B4A4D1-2754-4140-A2EB-9A76D9D7CDC6} folders.
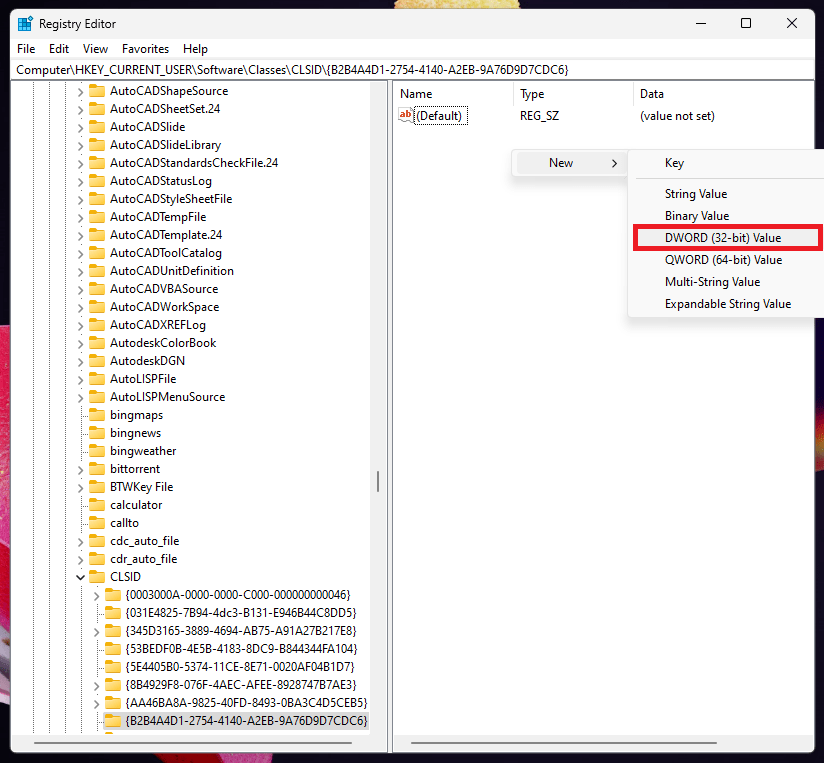
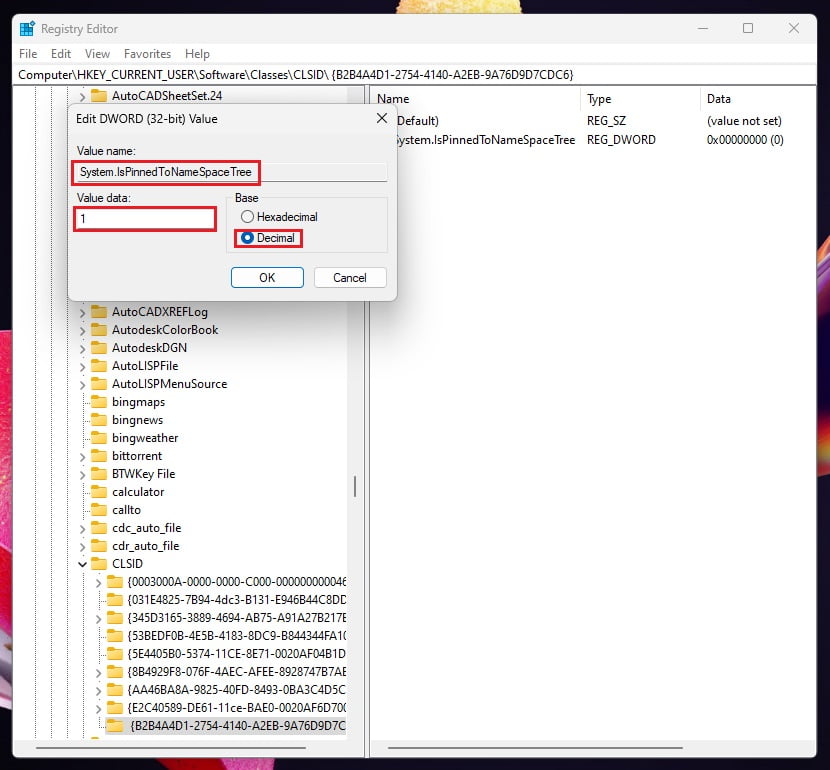
On the right side of the {B2B4A4D1-2754-4140-A2EB-9A76D9D7CDC6} folder key, right-click and create a new DWORD (32-bit) Value. Type a new key named System.IsPinnedToNameSpaceTree as shown in the image below:
After that, Double-click on the newly created value name (System.IsPinnedToNameSpaceTree) and enter the Value data as 1 to show the Ubuntu Linux folder on the File Explorer navigation pane in Windows 11.
Setting the Value data of 0 for the Ubuntu Linux folder will render it invisible in the File Explorer navigation pane in Windows 11.
Close and reboot your computer to make sure the changes take effect.
Thank you so much for reading this article! I hope this article will help you to add or remove Ubuntu Linux folder in Windows 11 file explorer’s navigation pane. If you have any questions, feel free to leave a comment below and we will get back to you as soon as possible!
If you like this article, kindly please share it and it may help others as well.
If our tutorials helped you, please consider buying us a coffee. We appreciate your support!
Thank you for your support.


